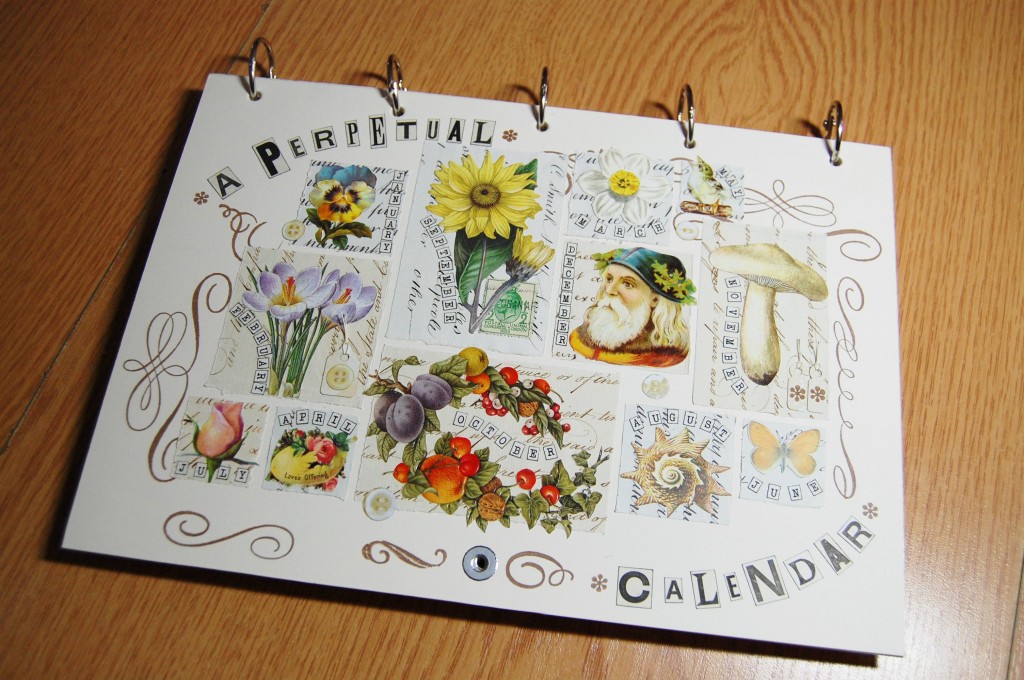
A Perpetual Calendar is a calendar that can be used for more than just one year. In this post I present a perpetual calendar that I made myself and describe the things included in it.
In a follow-up post I show just how the calendar was designed and made (link at the end of this post).
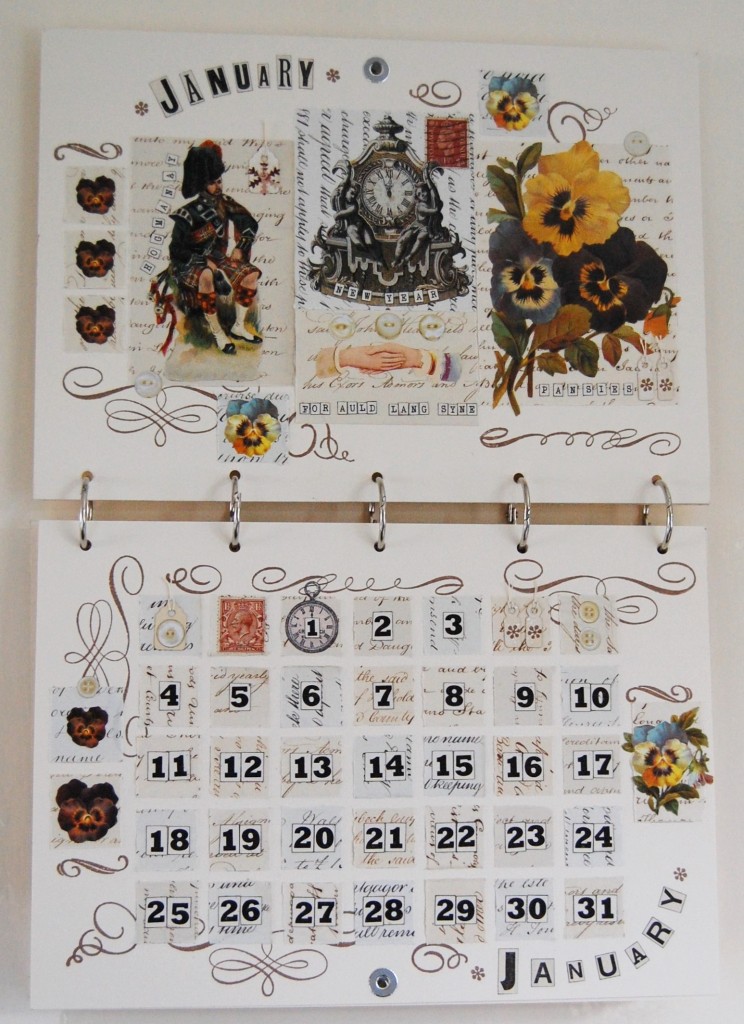
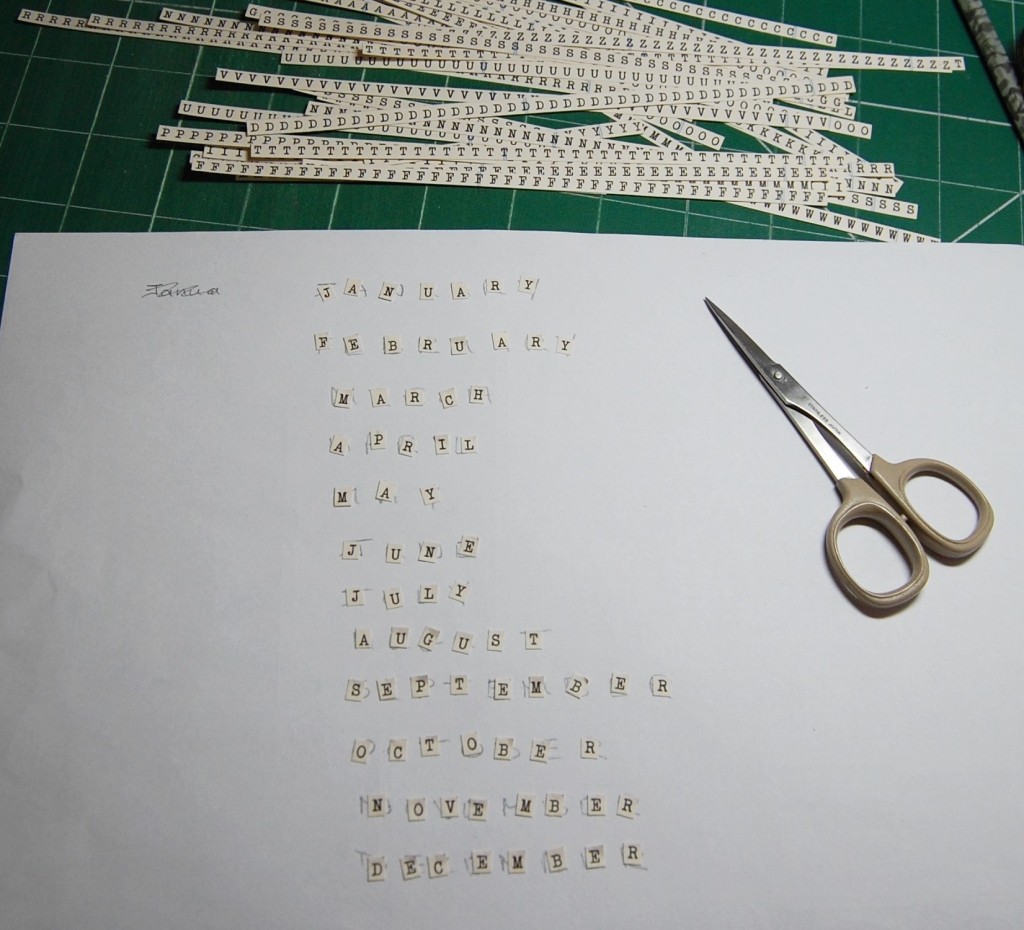
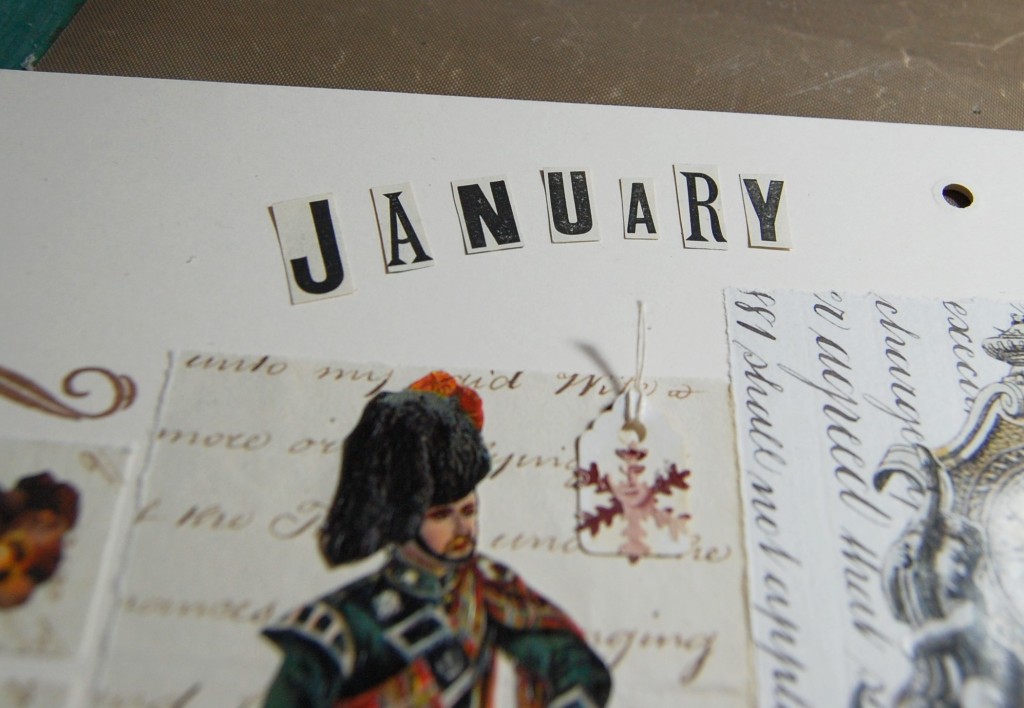
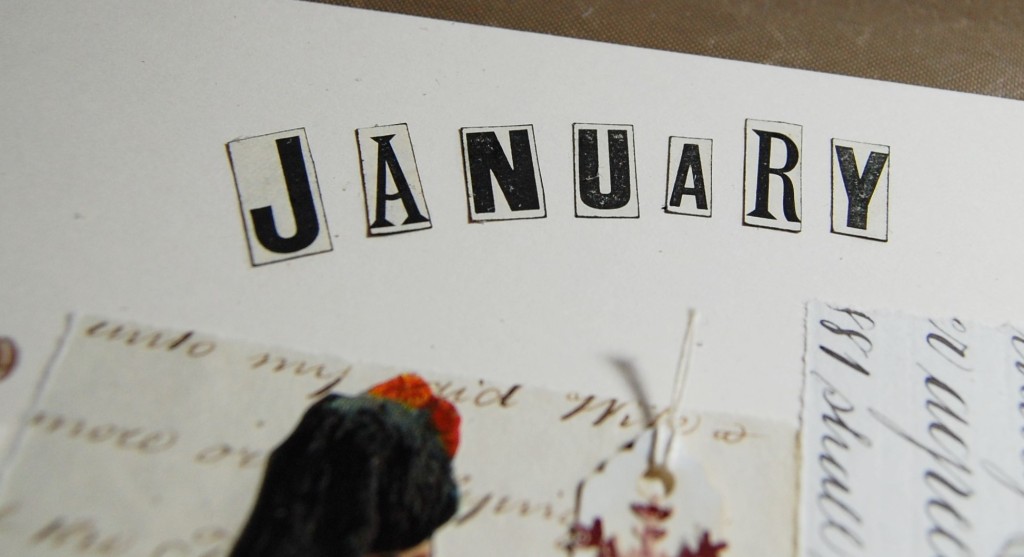
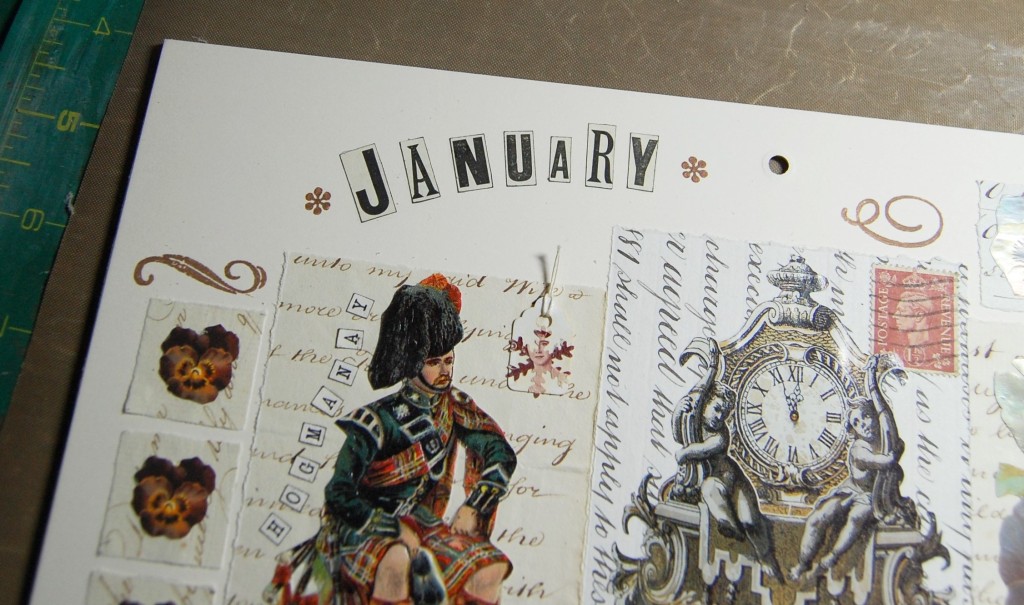
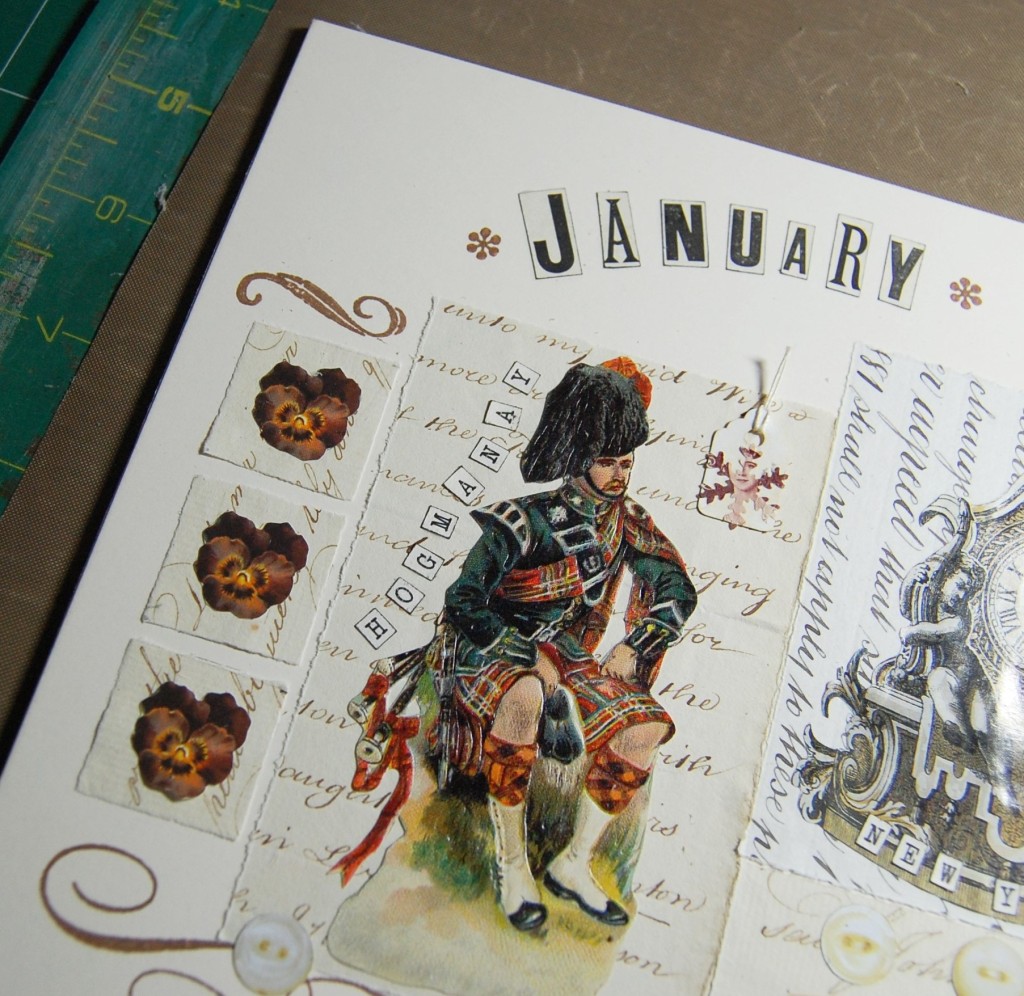
January
January decorative and date pages.
January decorative page in close up.
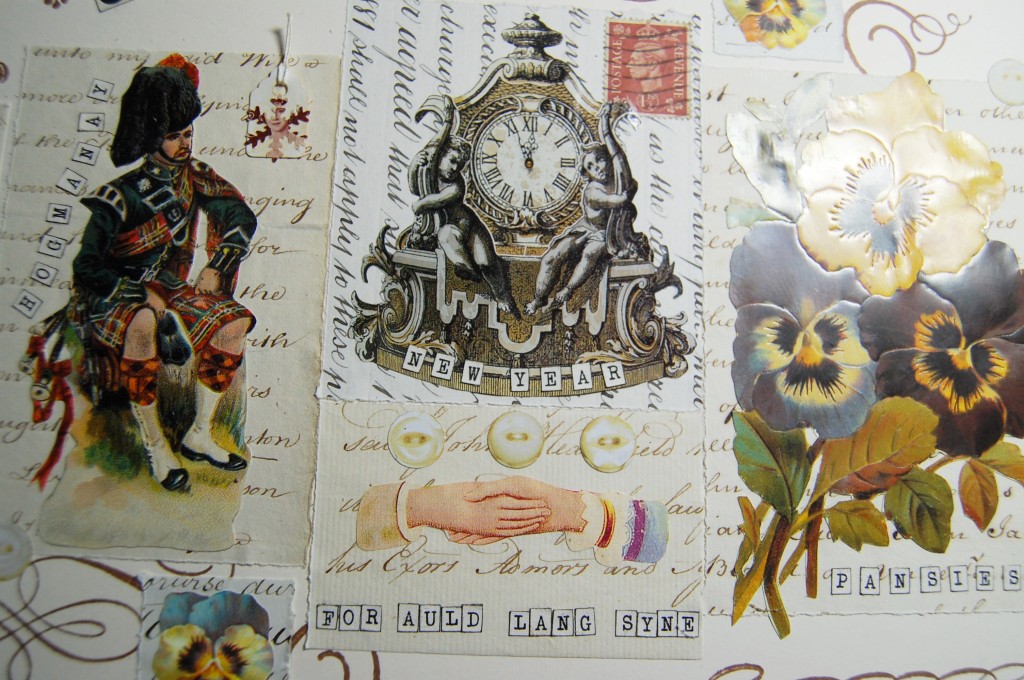
Images chosen for the January decorative page – winter pansies, Scottish piper (for Hogmanay), clock approaching twelve (for New Year), shaking hands (for Auld Lang Syne). Postage stamp, tags and paper buttons.
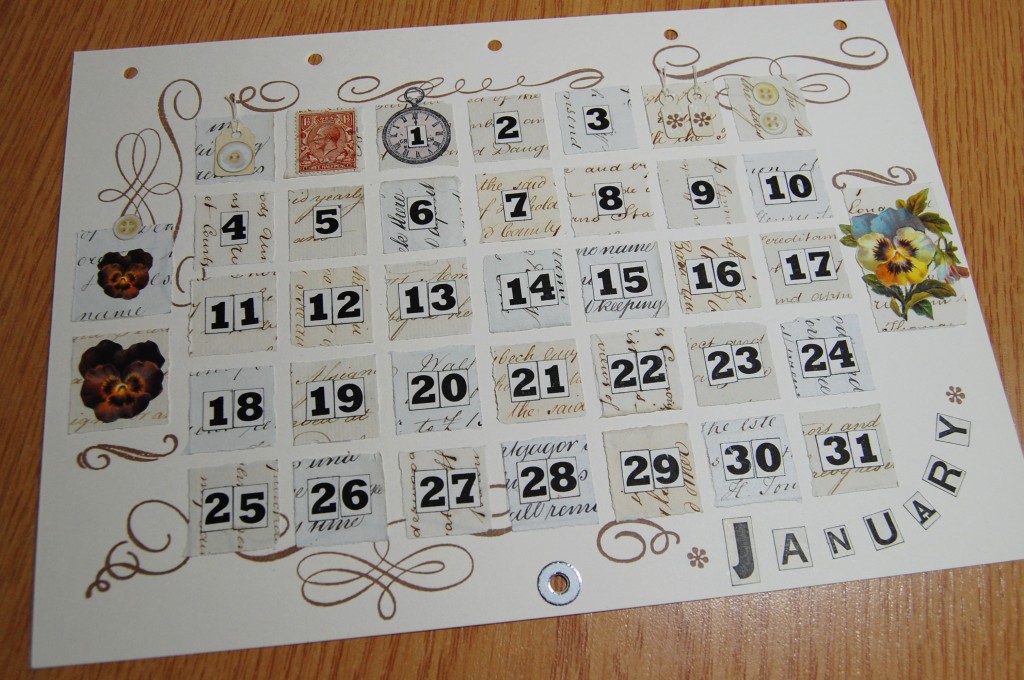
January date page in close up.
Images chosen for the January date page – winter pansies, pocket watch (for New Year on the 1st). Postage stamp, tags and paper buttons.
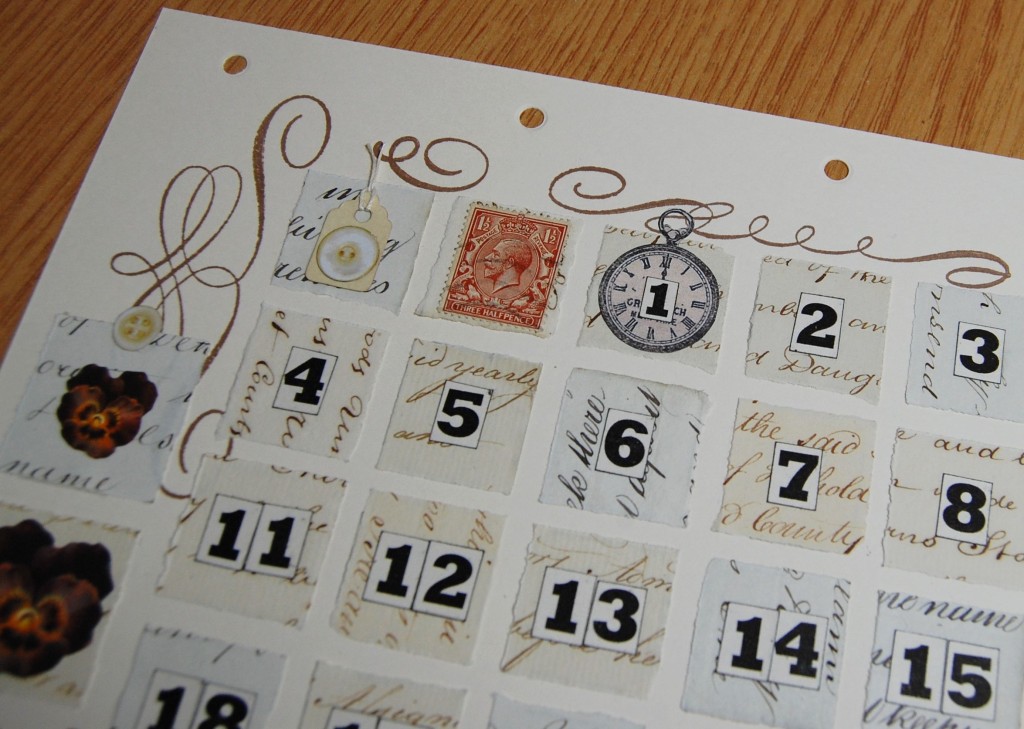
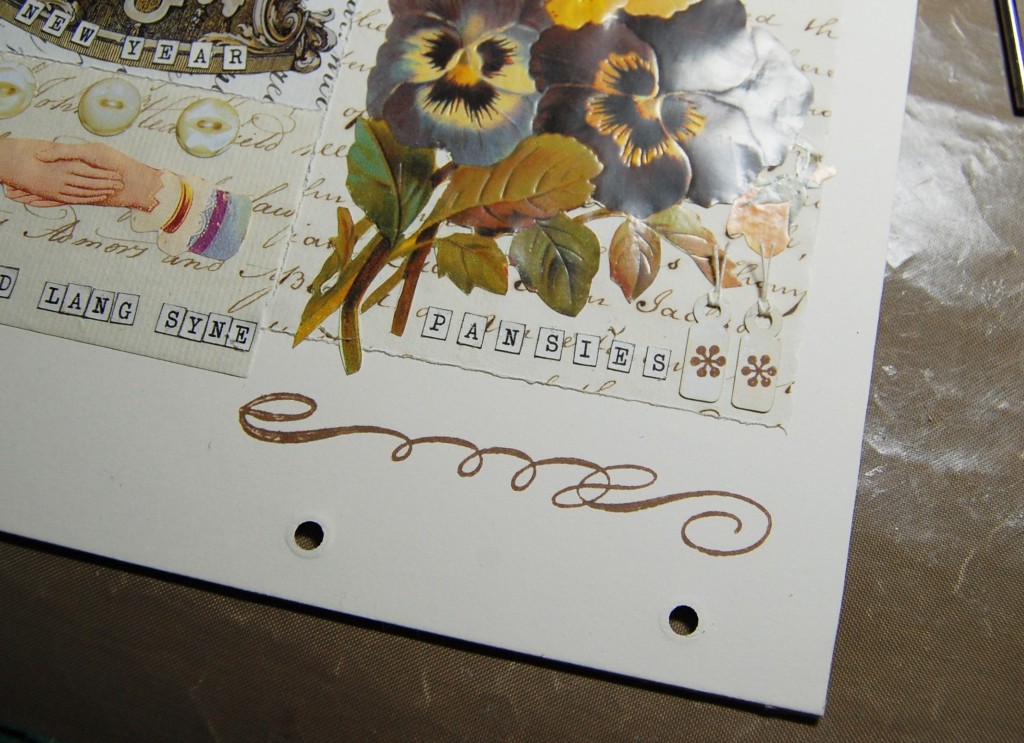
Detail from the January date page.
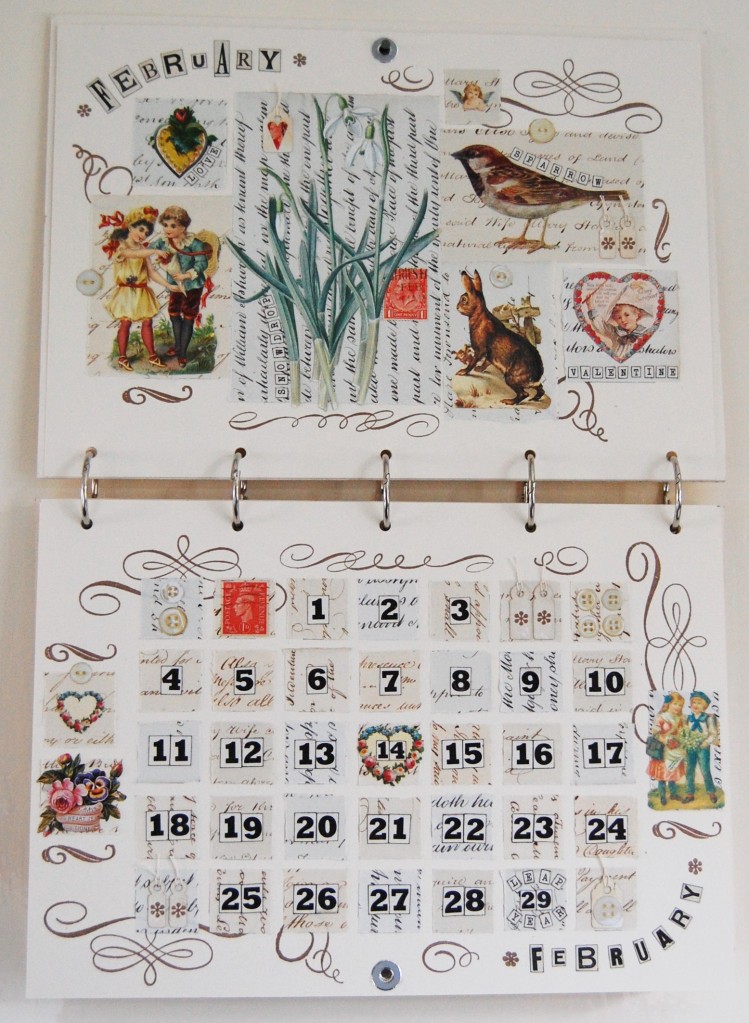
February
February decorative and date pages.
February decorative page in close up.
Images chosen for the February decorative page – snowdrops, rabbit in snow, sparrow, boy and girl scrap, heart scraps, angel scrap. Postage stamp, tags and paper buttons.
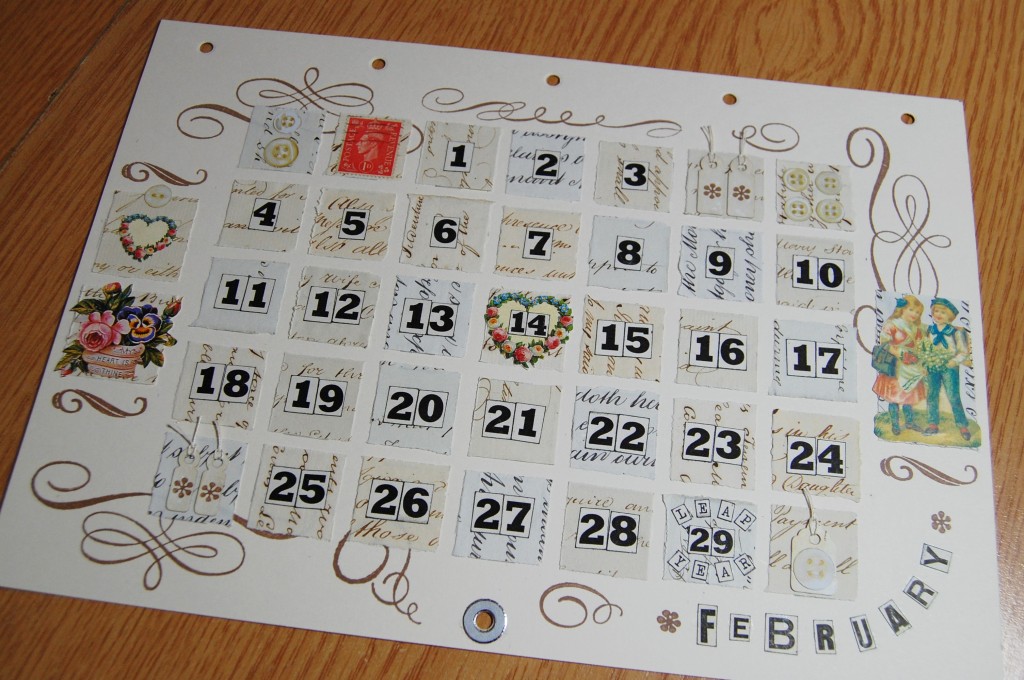
February date page in close up.
Images chosen for the February date page – basket of flowers, boy and girl scrap, heart scraps (one for Valentine’s Day on the 14th). Postage stamp, tags and paper buttons.
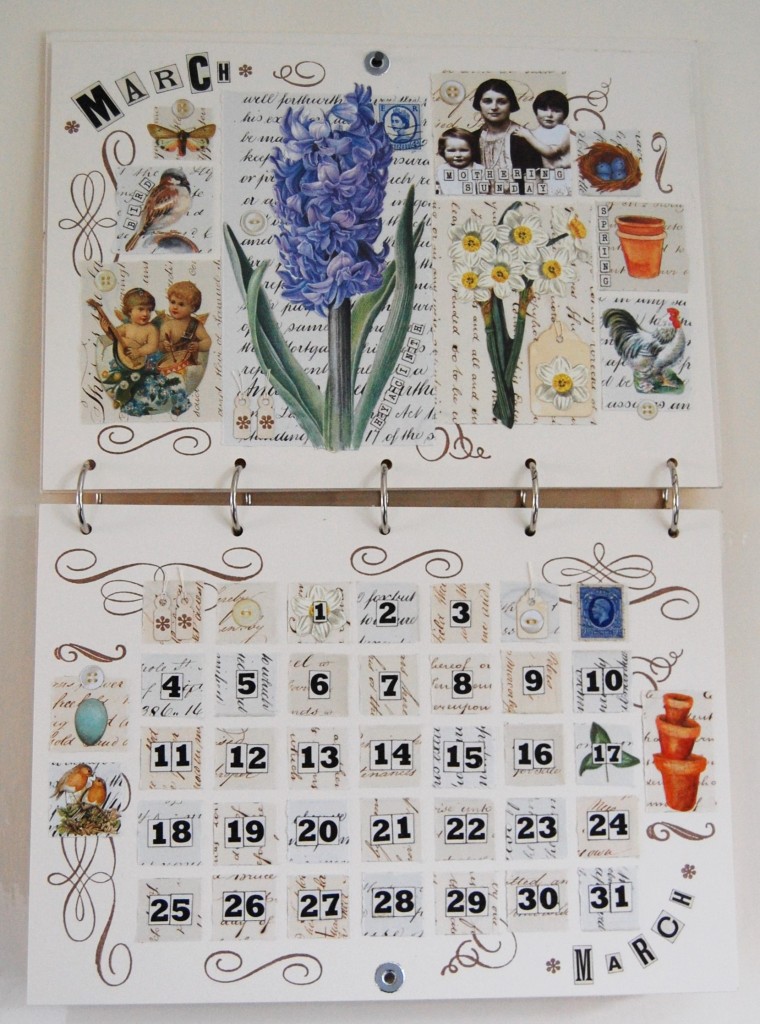
March
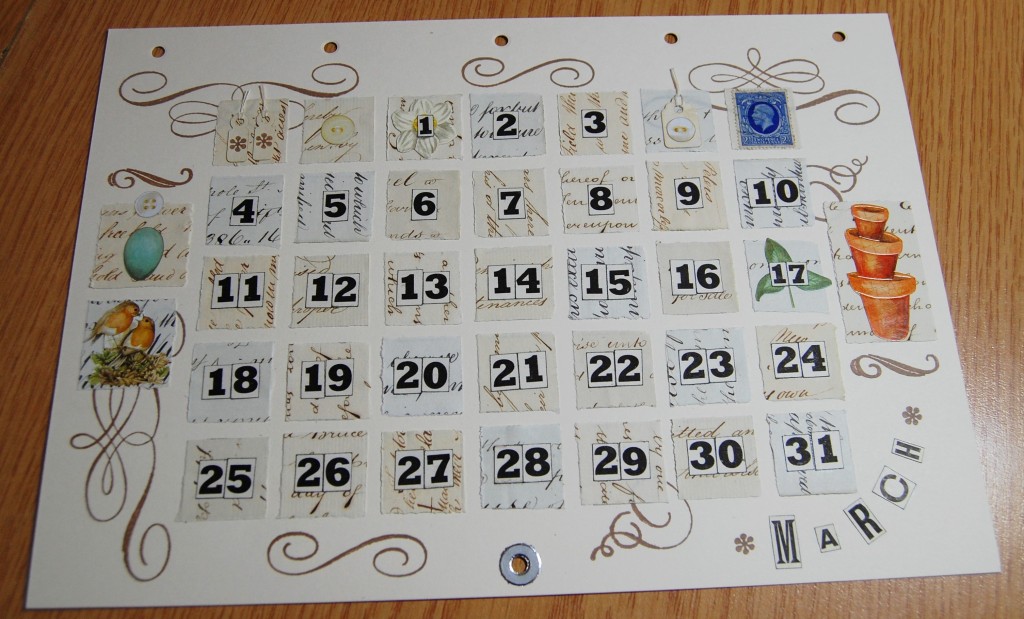
March decorative and date pages.
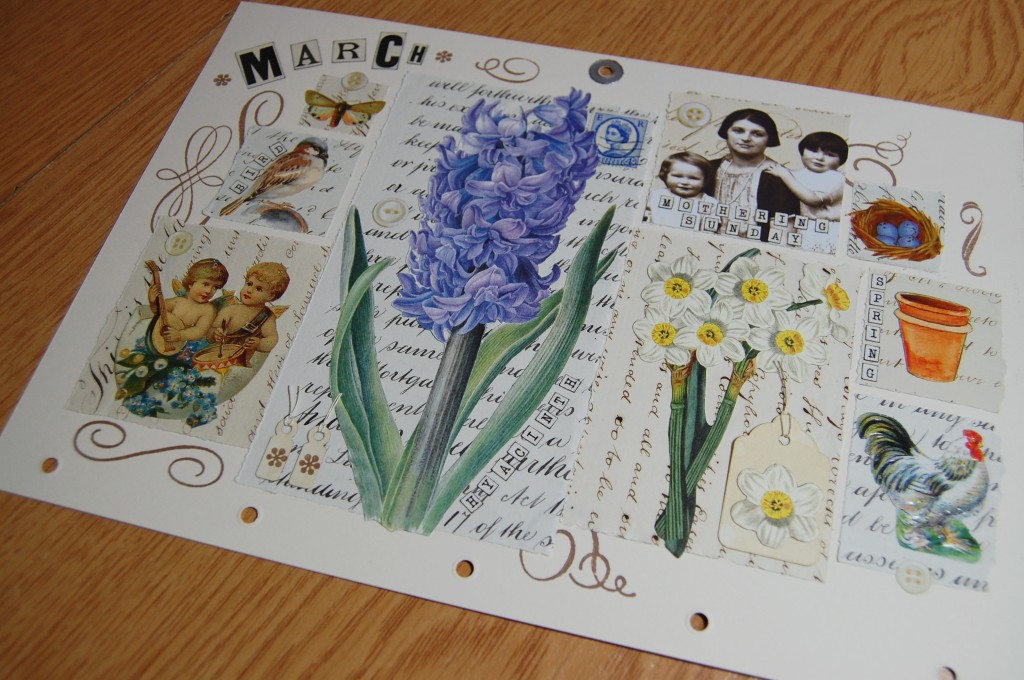
March decorative page in close up.
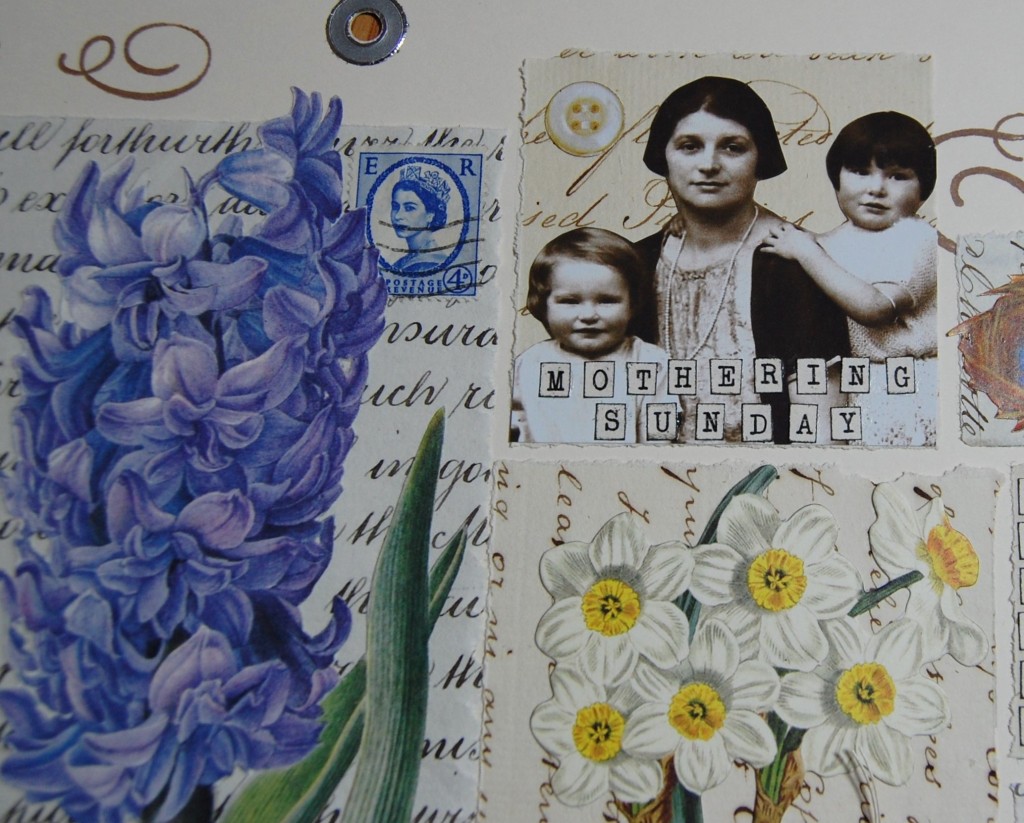
Images chosen for the March decorative page – blue hyacinth, daffodils, moth, bird, Easter scrap (sometimes Easter falls in late March), mother and children image (for Mothering Sunday), nest and eggs, garden pots, chicken.
Detail from the March decorative page.March date page in close up.
Images chosen for the March date page – egg, nesting birds, garden pots, shamrock (for St Patrick’s Day on the 17th). Postage stamp, tags and paper buttons.
April
April decorative and date pages
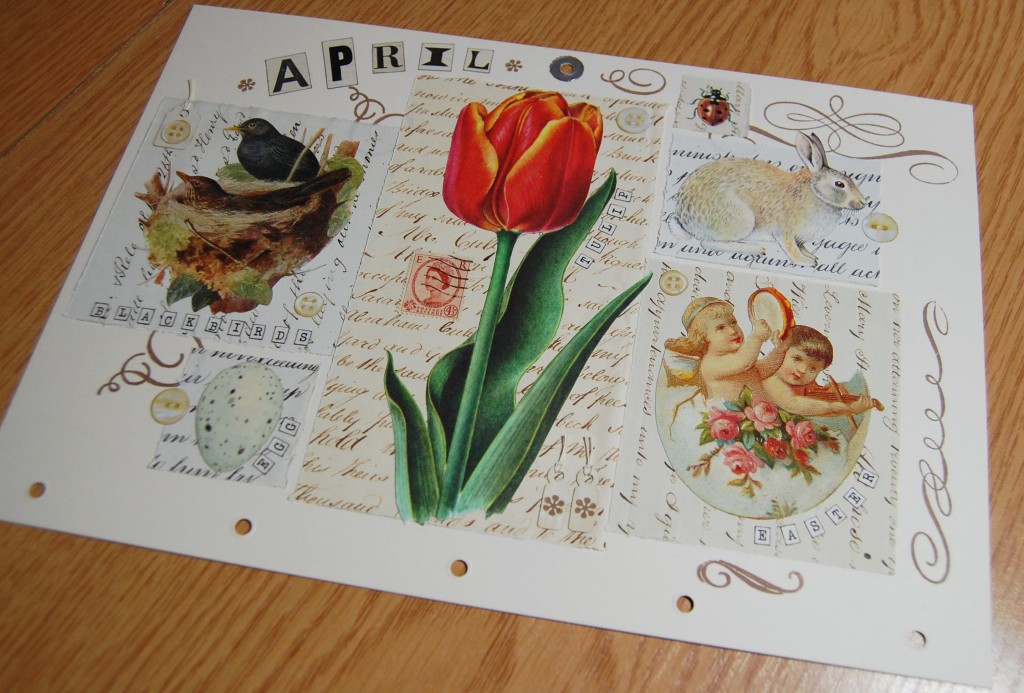
April decorative page in close up.
Images chosen for the April decorative page – tulip, blackbirds nesting, egg, rabbit, Easter scrap. Postage stamp, tags and paper buttons.
April date page in close up.
Images chosen for the April date page – ladybird, Easter egg scrap, lamb, joker (for April Fool’s Day on the 1st), English flag (for St George’s Day on the 25th). Postage Stamp, tags and paper buttons.
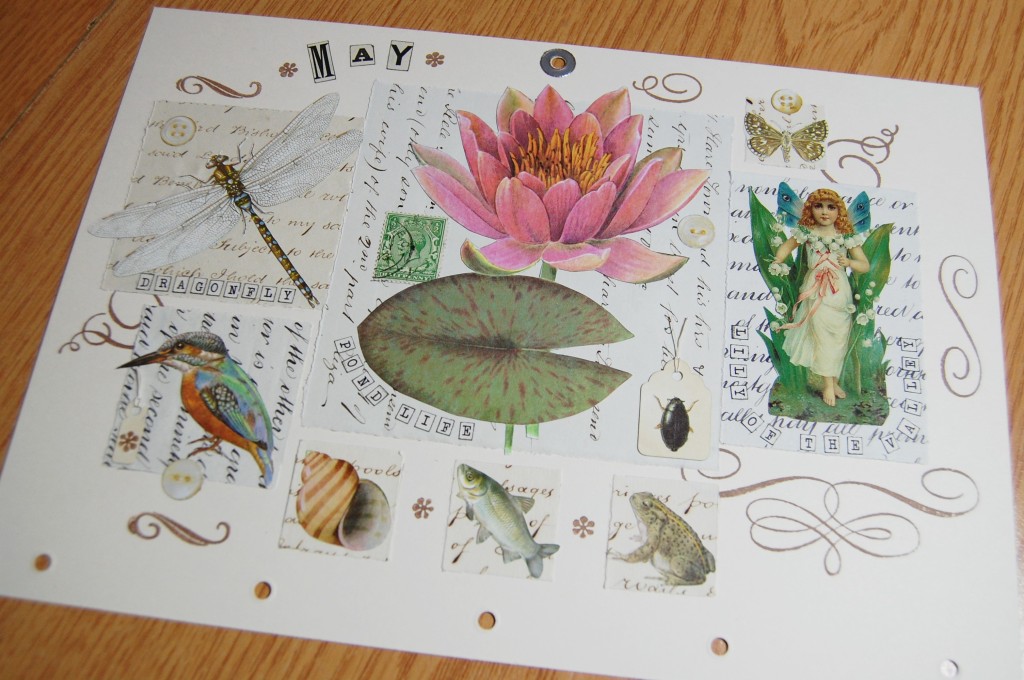
May
May decorative and date pages.
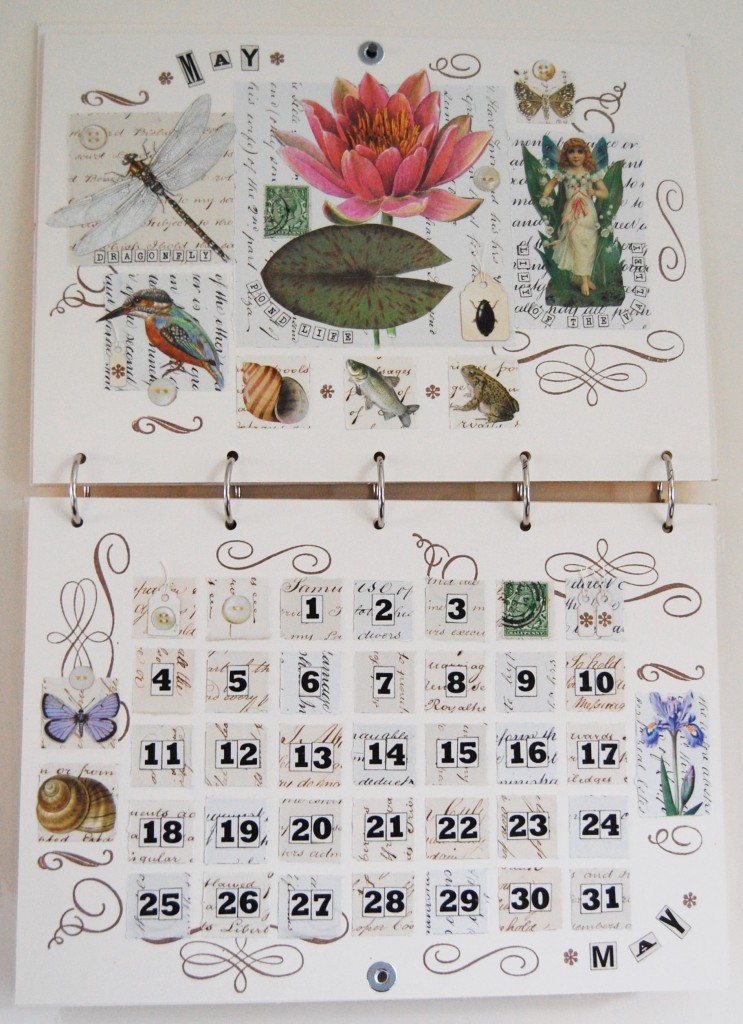
May decorative page in close up.
Images chosen for the May decorative page – water lily, dragonfly, kingfisher, pond snail, fish, frog, whirligig beetle, lily of the valley fairy, butterfly. Postage stamp, tags and paper buttons.
May date page in close up.
Images chosen for the May date page – butterfly, pond snail, iris. Postage stamp, tags and paper buttons.
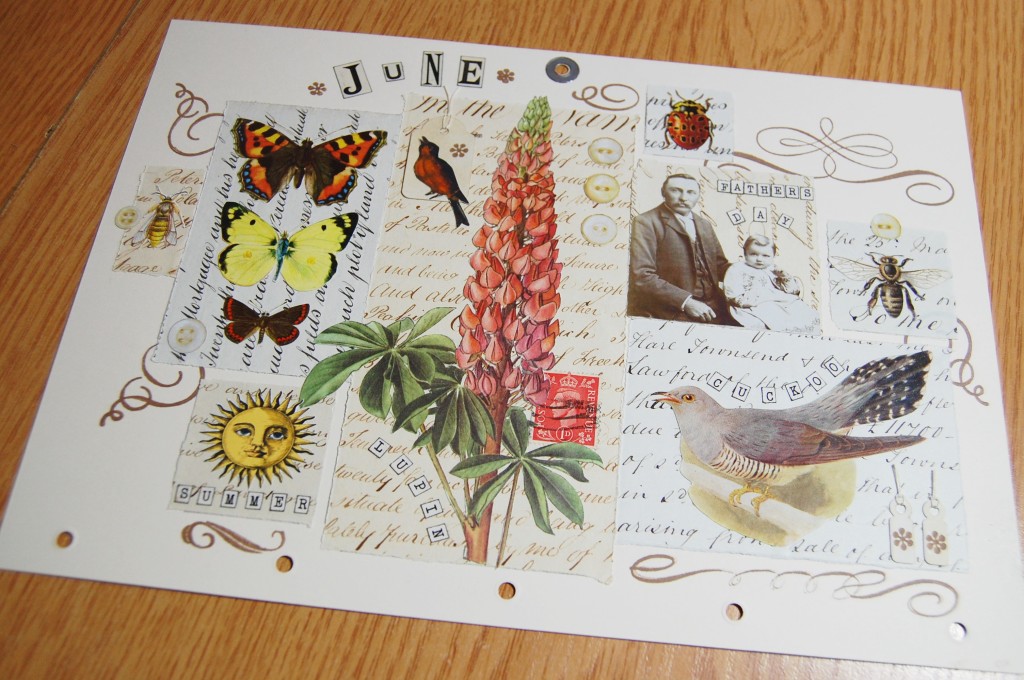
June
June decorative page in close up.
Images chosen for the June decorative page – lupin, butterflies, wasp, sun, cuckoo, father and child (for Father’s Day), ladybird, honey bee. Postage stamp, tags and paper buttons.
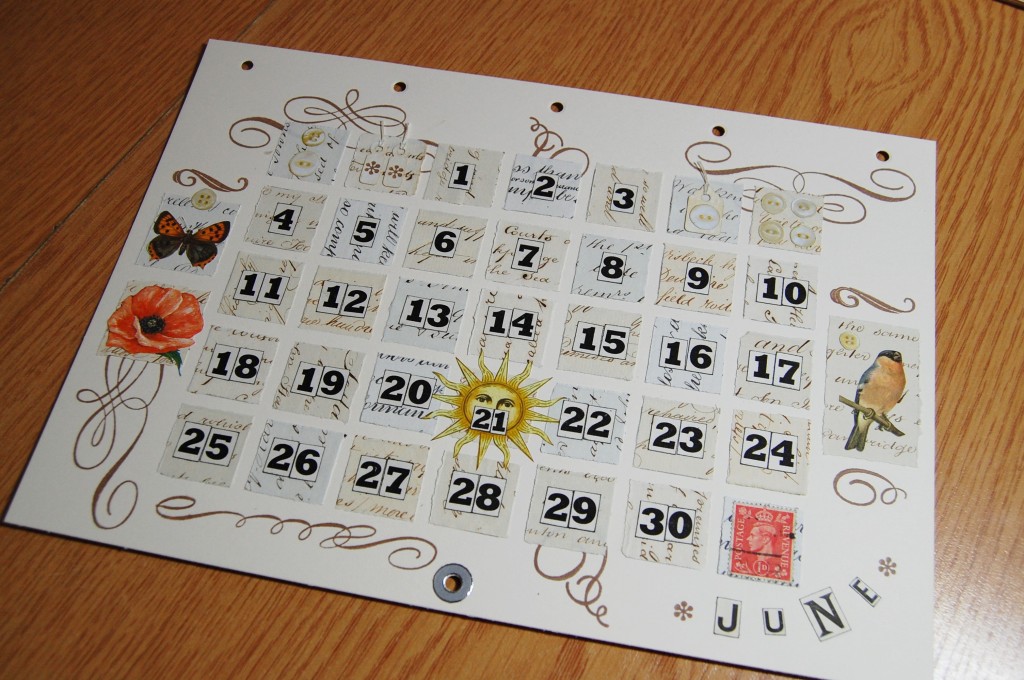
June date page in close up.
Images chosen for the June date page – butterfly, poppy, bird, yellow sun (for the summer solstice on the 21st). Postage stamp, tags and paper buttons.
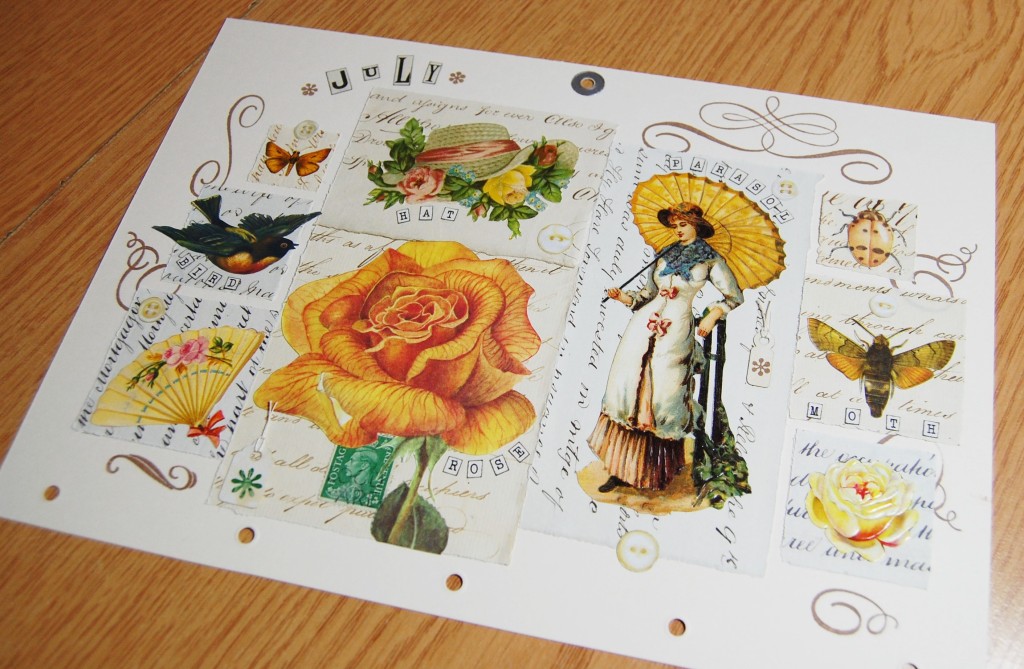
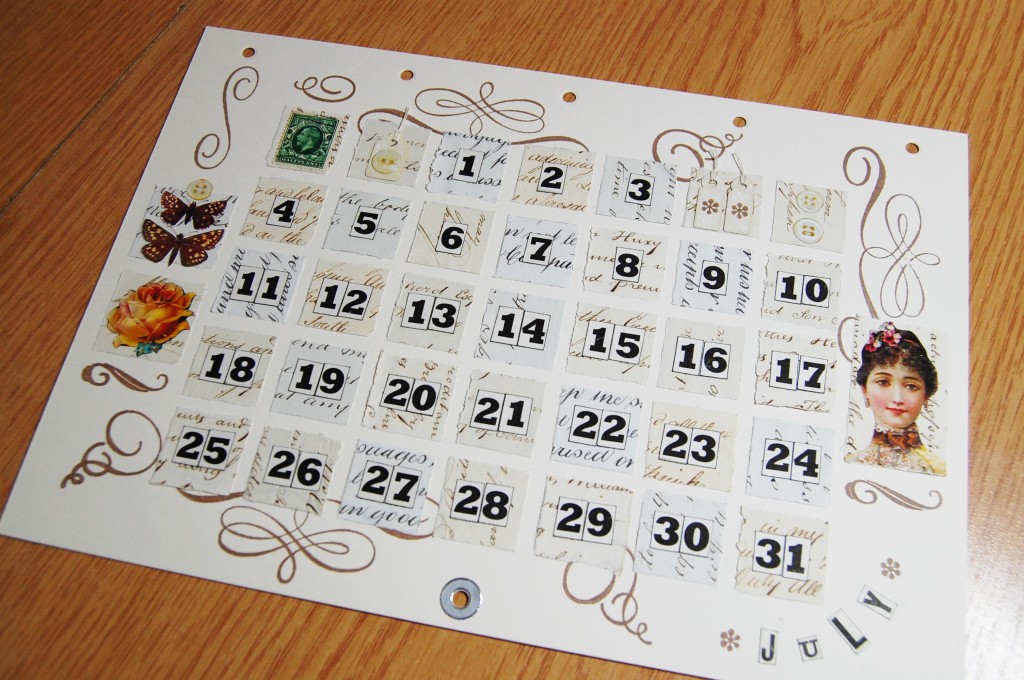
July
July decorative and date pages.
July decorative page in close up.
Images chosen for the July decorative page – rose, sun hat scrap, lady with a parasol scrap, fan, bird, butterfly, ladybird, moth, small rose scrap. Postage stamp, tags and paper buttons.
July date page in close up.
Images chosen for the July date page – butterflies, rose, lady’s portrait scrap. Postage stamp, tags and paper buttons.
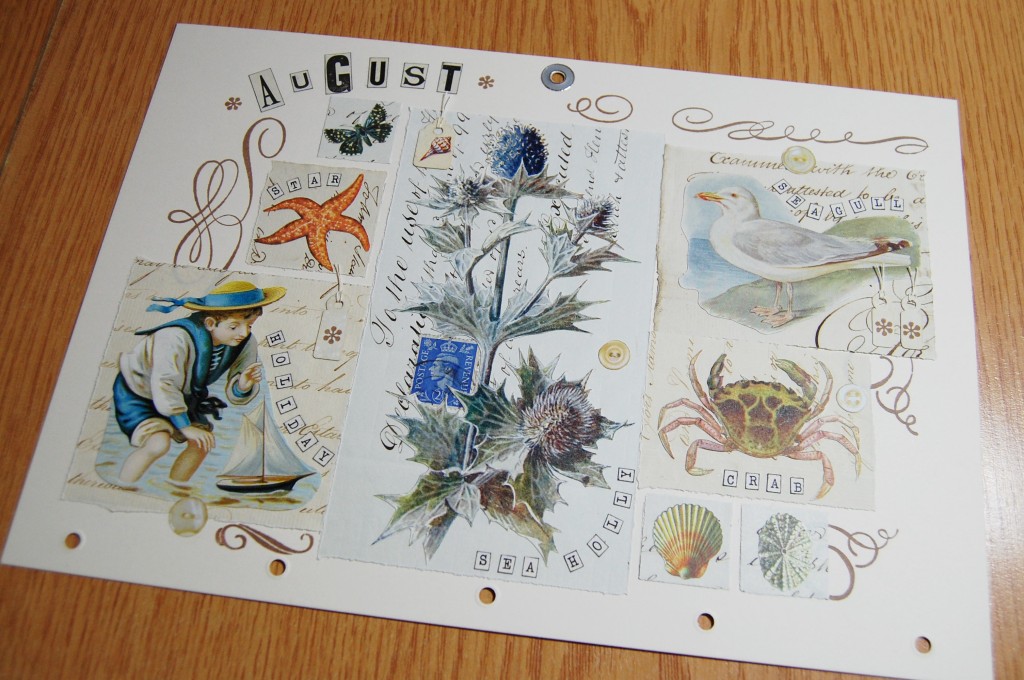
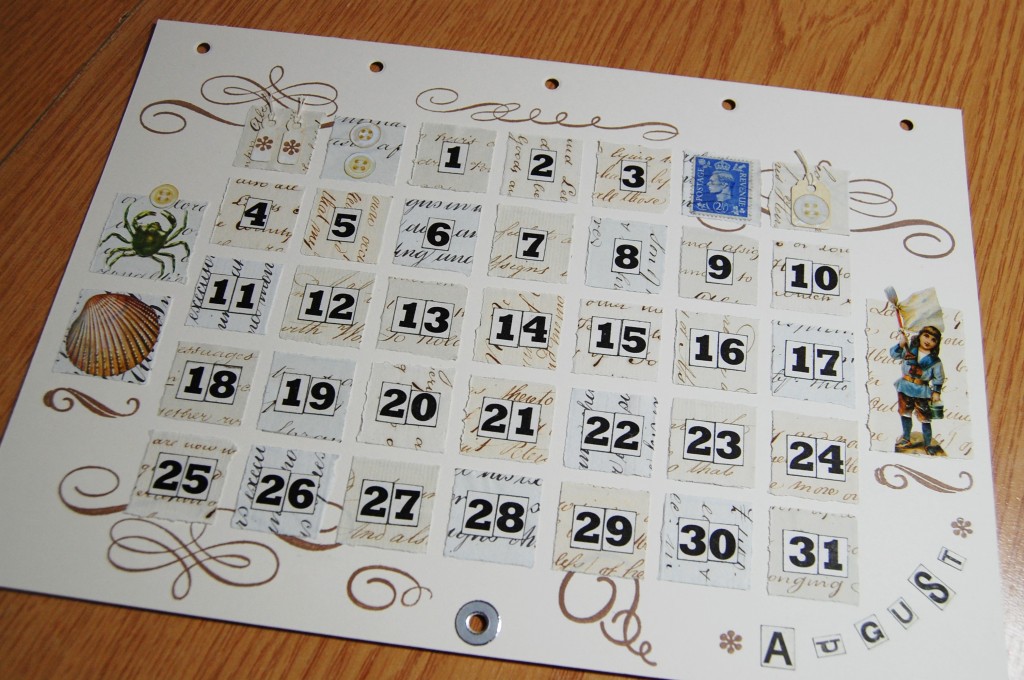
August
August decorative and date pages.
August decorative page in close up.
Images chosen for the August decorative page – sea holly, boy and boat scrap, star fish, butterfly, seagull, crab, shells. Postage stamp, tags and paper buttons.
August date page in close up.
Images chosen for the August date page – crab, shell, child scrap. Postage stamp, tags and paper buttons.
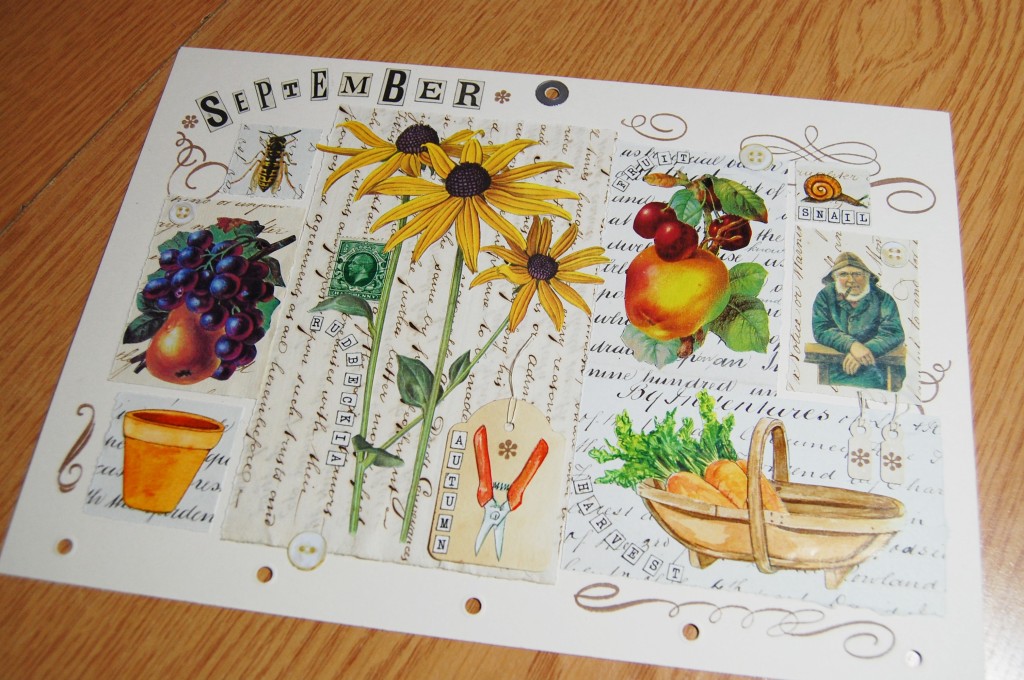
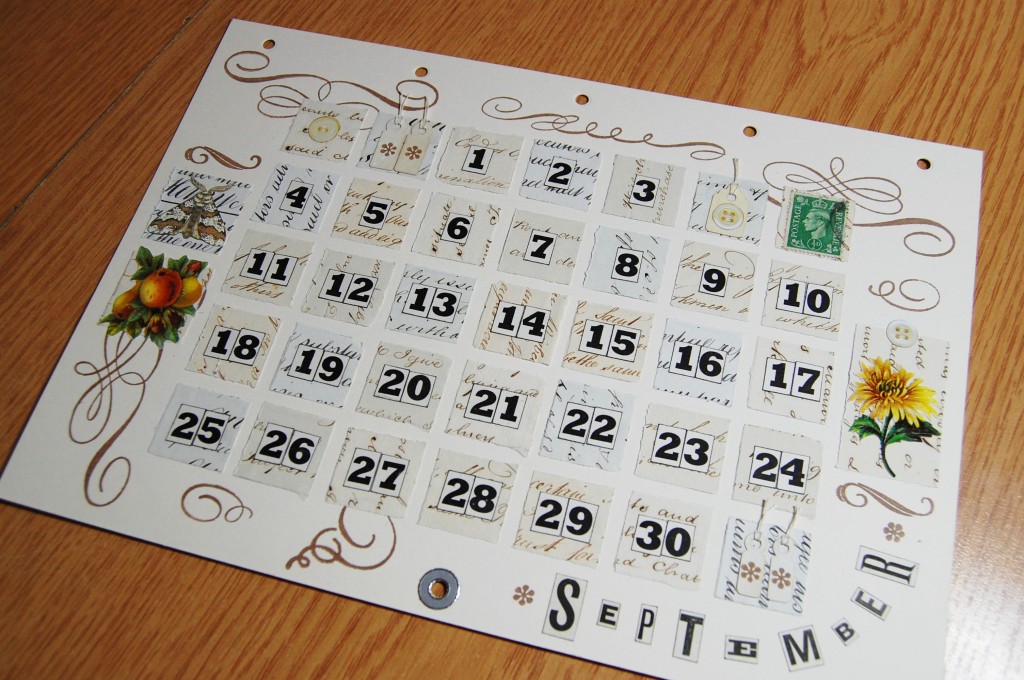
September
September decorative and date pages.
September decorative page in close up.
Images chosen for the September decorative page – rudbeckia, wasp, fruit scraps, garden pot, trug with carrots, old gentleman scrap, snail, garden shears. Postage stamp, tags and paper buttons.
September page in close up.
Images chosen for the September date page – moth, fruit scrap, flower scrap. Postage stamp, tags and paper buttons.
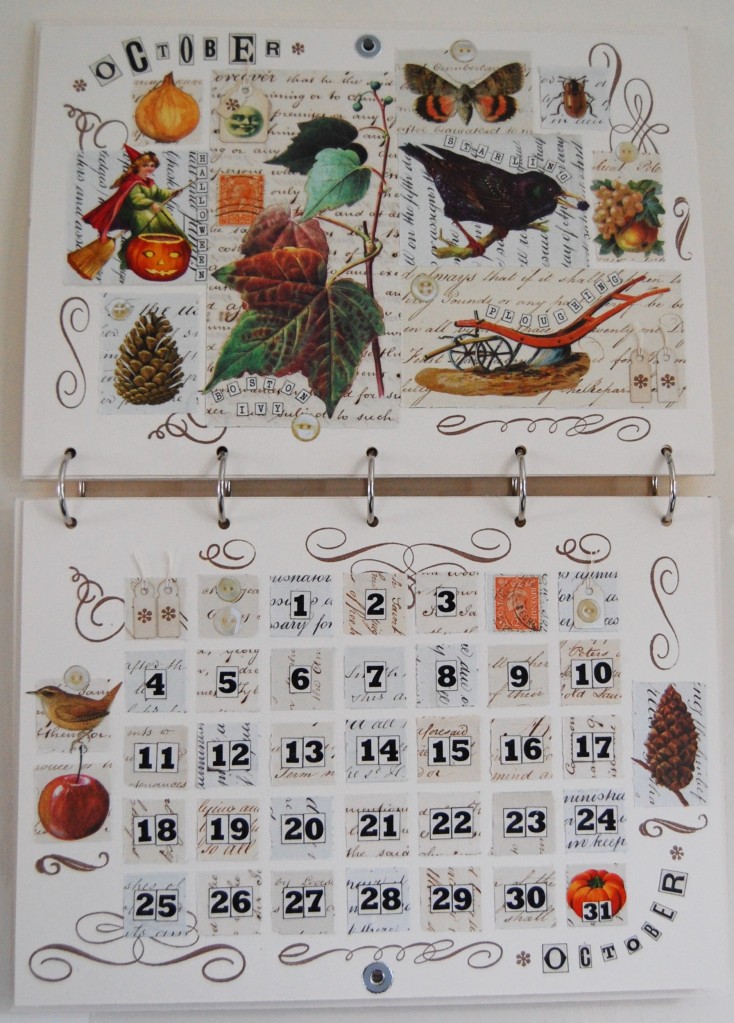
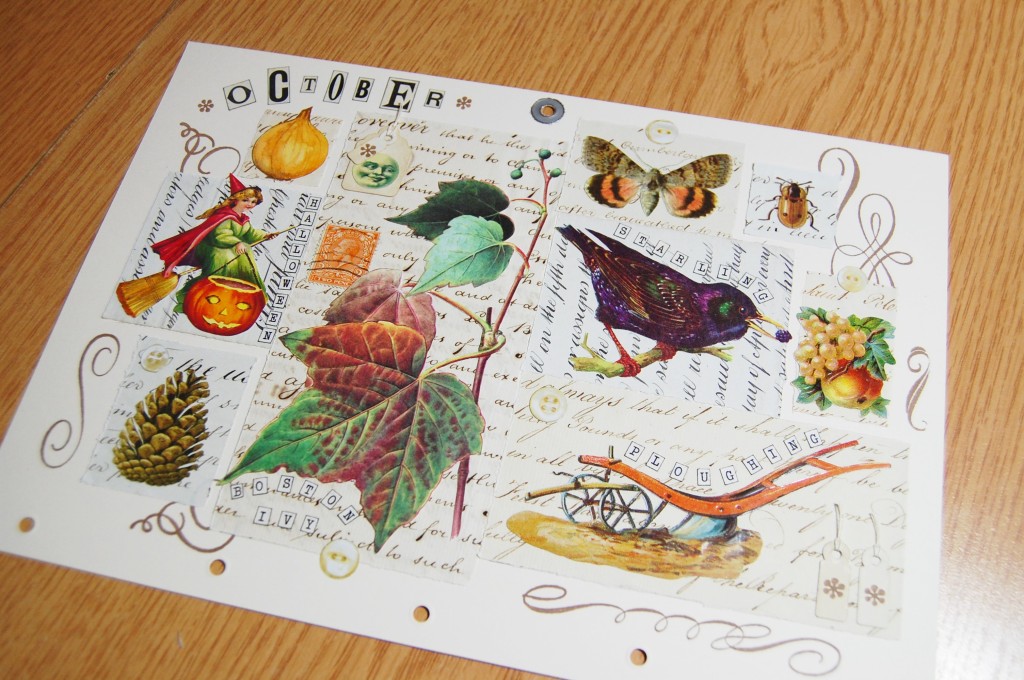
October decorative and date pages.
September decorative page in close up.
Images chosen for the October decorative page – ivy, plough, starling, fruit scrap, moth, ladybird, moon face, onion, witch (for Halloween), pine cone. Postage stamp, tags and paper buttons.
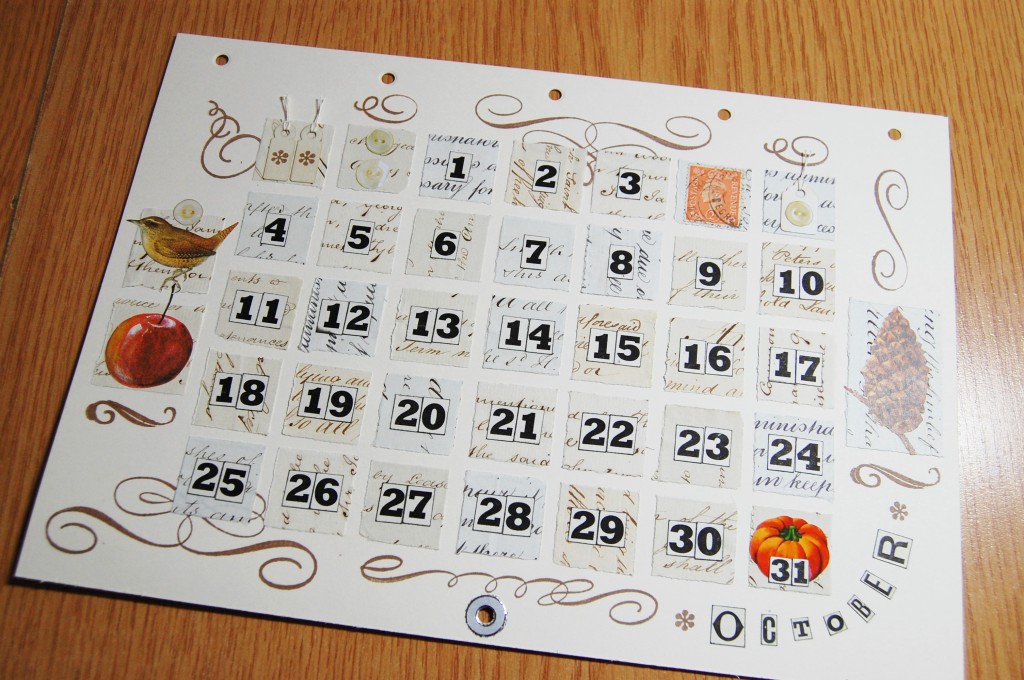
October date page in close up.
Images chosen for the October date page – bird, apple, pine cone, pumpkin (for Halloween on the 31st). Postage stamp, tags and paper buttons.
November
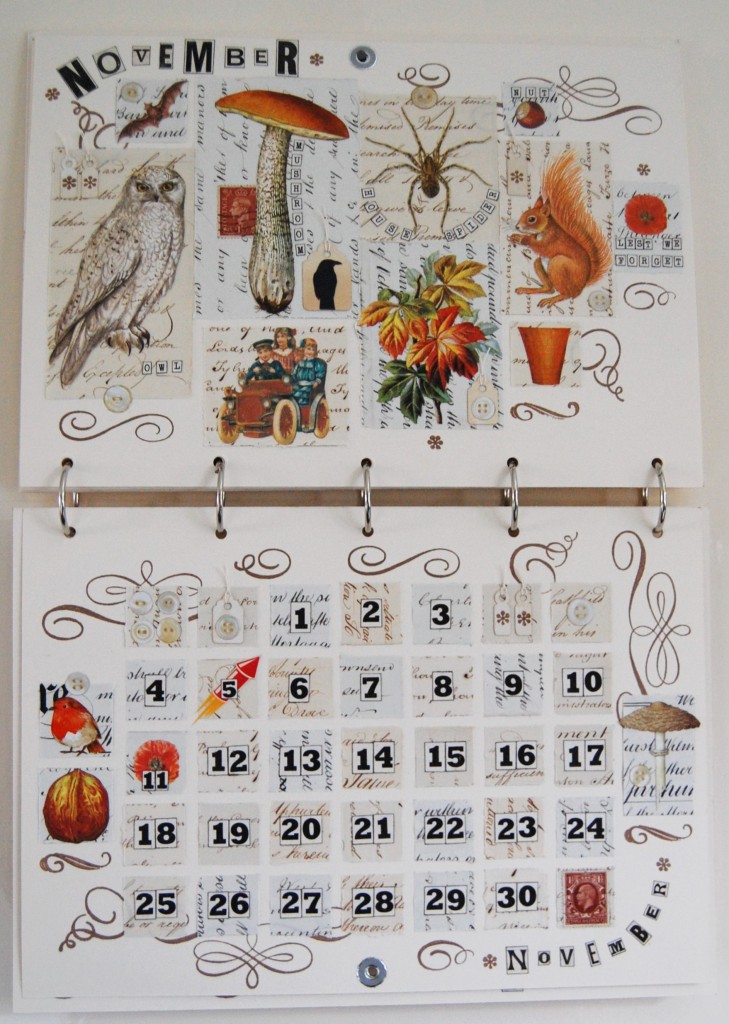
November decorative and date pages.
November decorative page in close up.
Images chosen for the November decorative page – owl, bat, mushroom, car scrap, autumn leaves scrap, spider, squirrel, garden pot, nut, poppy (for Remembrance Day). Postage stamp, tags and paper buttons.
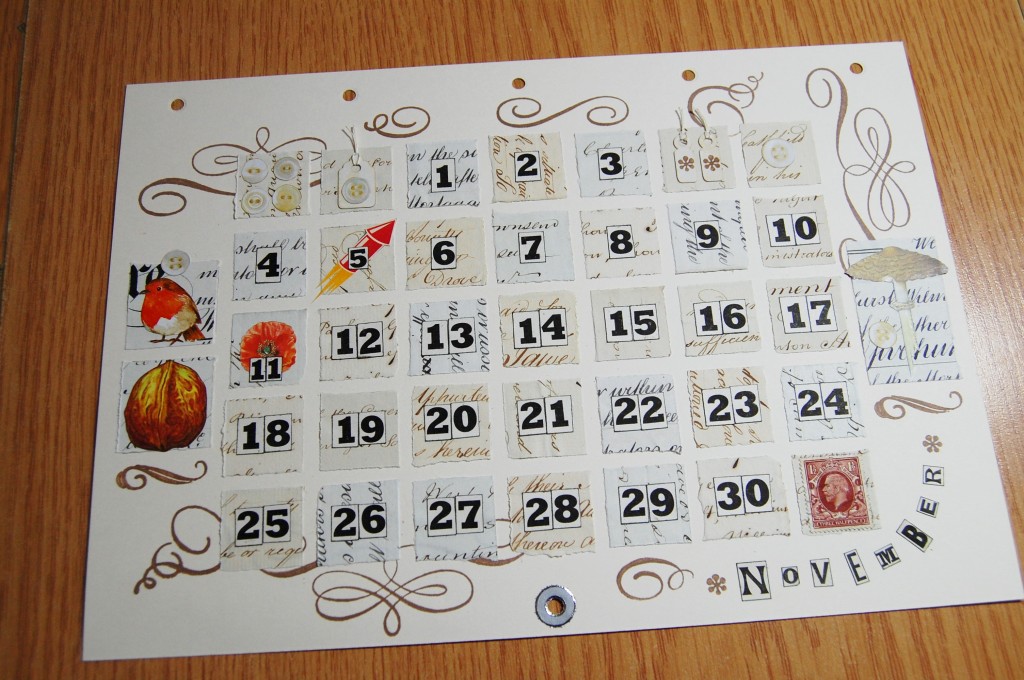
November date page in close up.
Images chosen for the November date page – robin, walnut, mushroom, firework (for Bonfire Night on the 5th), poppy (for Remembrance Day on the 11th). Postage stamp, tags and paper buttons.
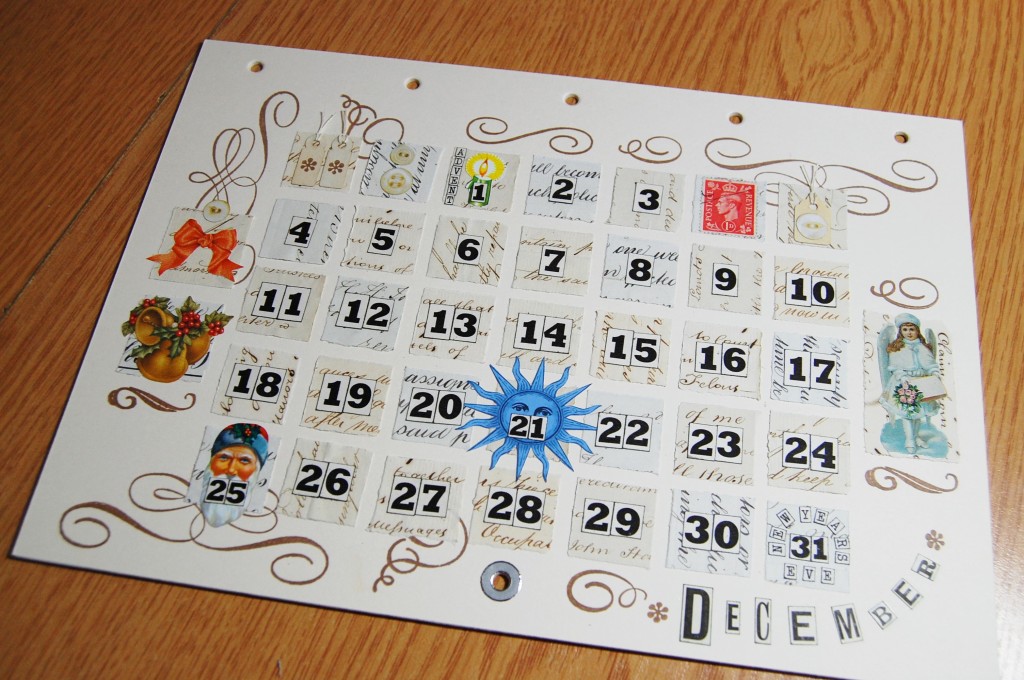
December
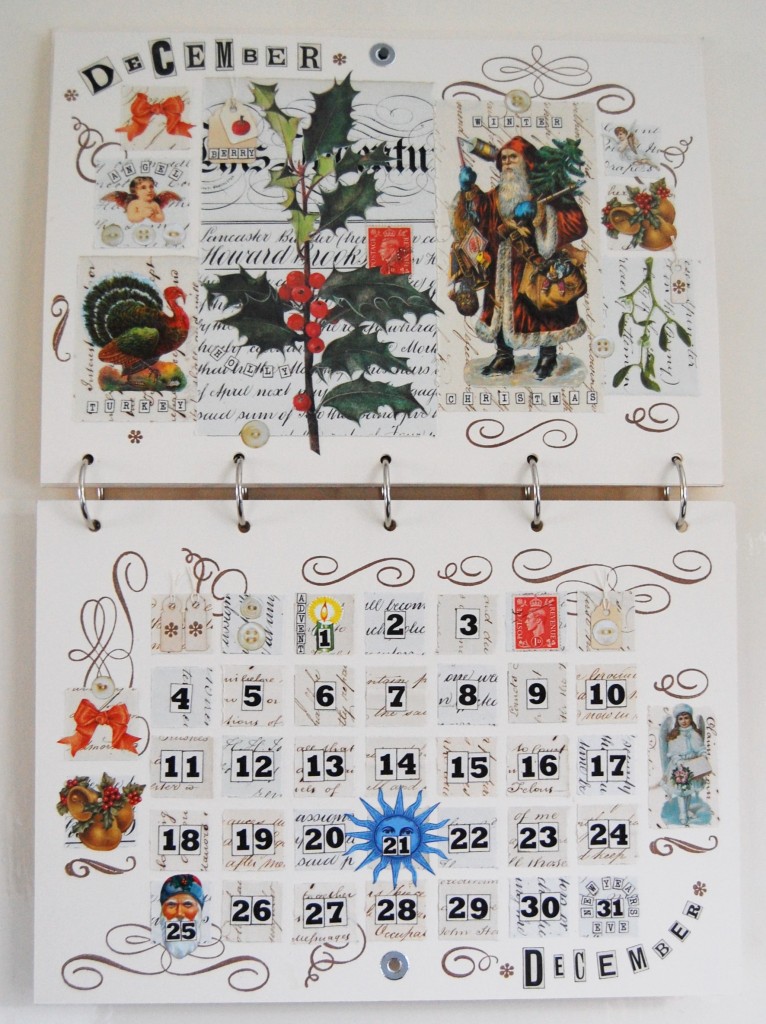
December decorative and date pages.
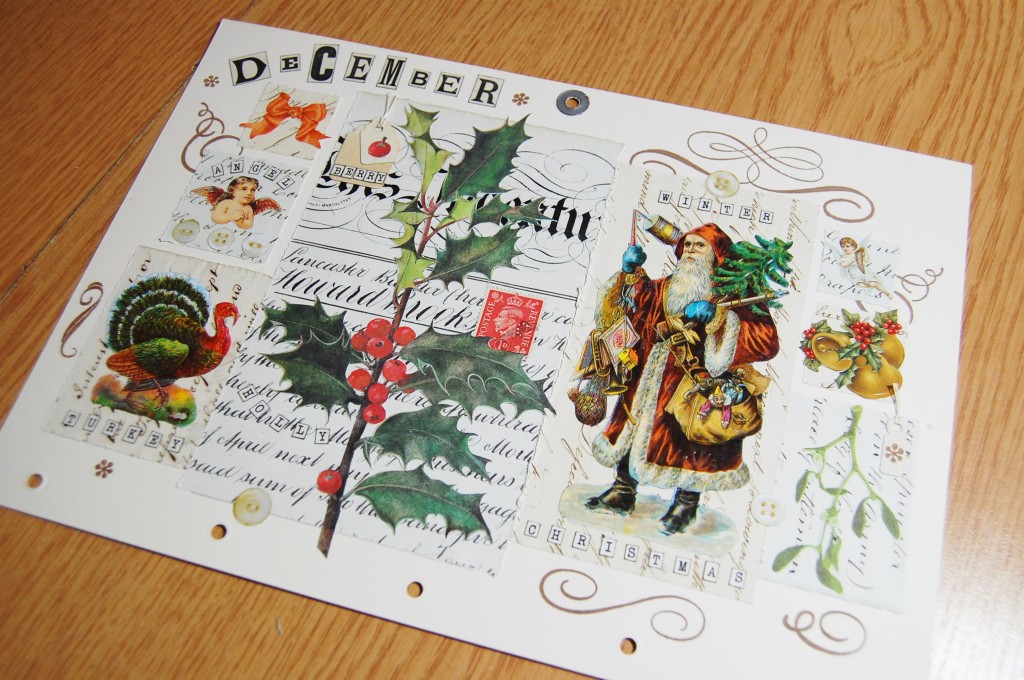
December decorative page in close up.
Images chosen for the December decorative page – holly and berries, Santa, turkey, angels, red bow scrap, bells, mistletoe. Postage stamp, tags and paper buttons.
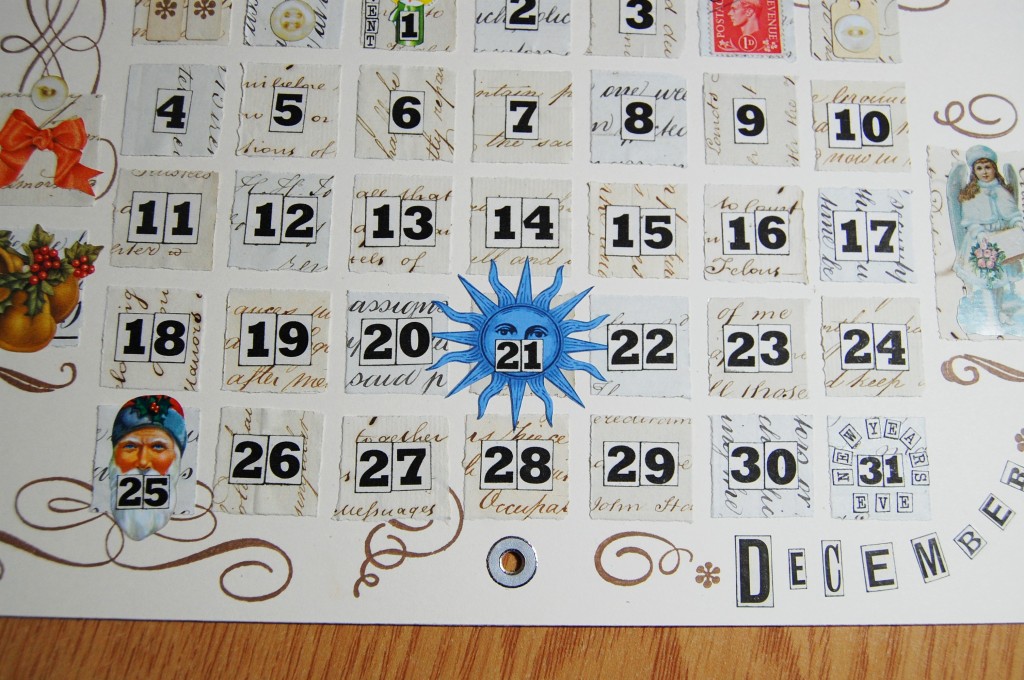
December date page in close up.
Images chosen for the December date page – red bow scrap, bells, Christmas angel, candle (for Advent on the 1st), blue sun (for the winter solstice on the 21st), Santa face (for Christmas Day on the 25th). Postage stamp, tags and paper buttons.
Detail for the December date page.
See Part Two for the making of this calendar project.
A Perpetual Calendar is a calendar that can be used for more than just one year. This is the story of how I made a Perpetual Calendar of my own.
Concept
Apart from various Advent Calendars I have never made a ‘proper’ calendar before so I thought it was about time I did so. My first idea was to design a calendar for the year 2022, as it was already October 2020 and too late to make one for 2021. After initially exploring how I would present the dates and days of the week it became apparent that if I wanted to make the best calendar I possibly could, it would be time consuming and more involved than I originally thought – a shame then to only have the calendar on show for one year. What I needed was to find a way of being able to keep the calendar up on the wall for many years to come. A Perpetual Calendar seemed the only way, so that’s what I decided upon.
Calendar Style
I had a clear idea of what I wanted the calendar to look like from the beginning. I wanted an A4 landscape oriented wall calendar. It would hang on a nail from a hole set near the bottom of the front cover, and once hung there would be a decorative page at the top and a page of dates underneath. To change the month, you would just flip the bottom page up and hook it onto the nail.
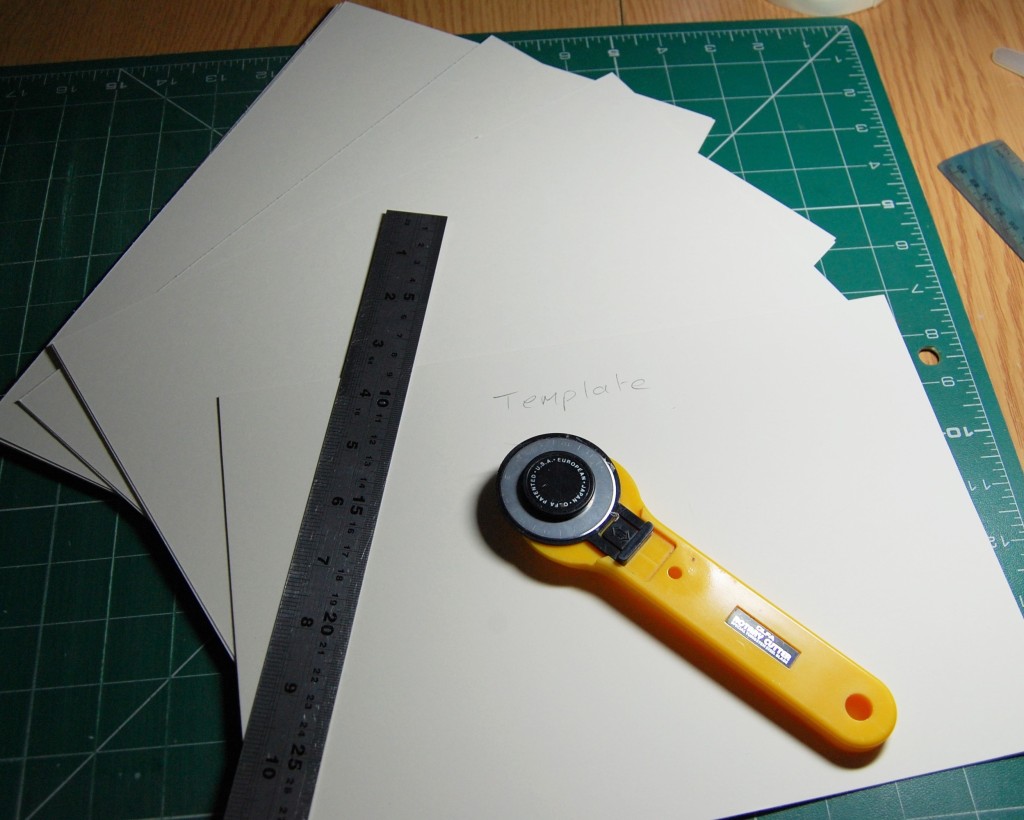
I decided to use card as the basis for the calendar, and join all the pages together with metal book rings. The front and back covers would be A4, while the inside pages would be slightly smaller. With this in mind I made a card template in the size of the pages (28.5 x 19cm) so I could design each page to the correct size.
Style of calendar I would make
Choosing Materials and Designing
When it came to the look of the calendar, again I had a clear idea from the outset. I knew I wanted to use a plain background with illustrations and scraps stuck on to script paper mats. The plain areas would then be stamped with old fashioned scrolls and accents. With this in mind, I started putting together my first design. In the next section we look at this process in detail with the ‘February’ page.
Designing a Decorative Page
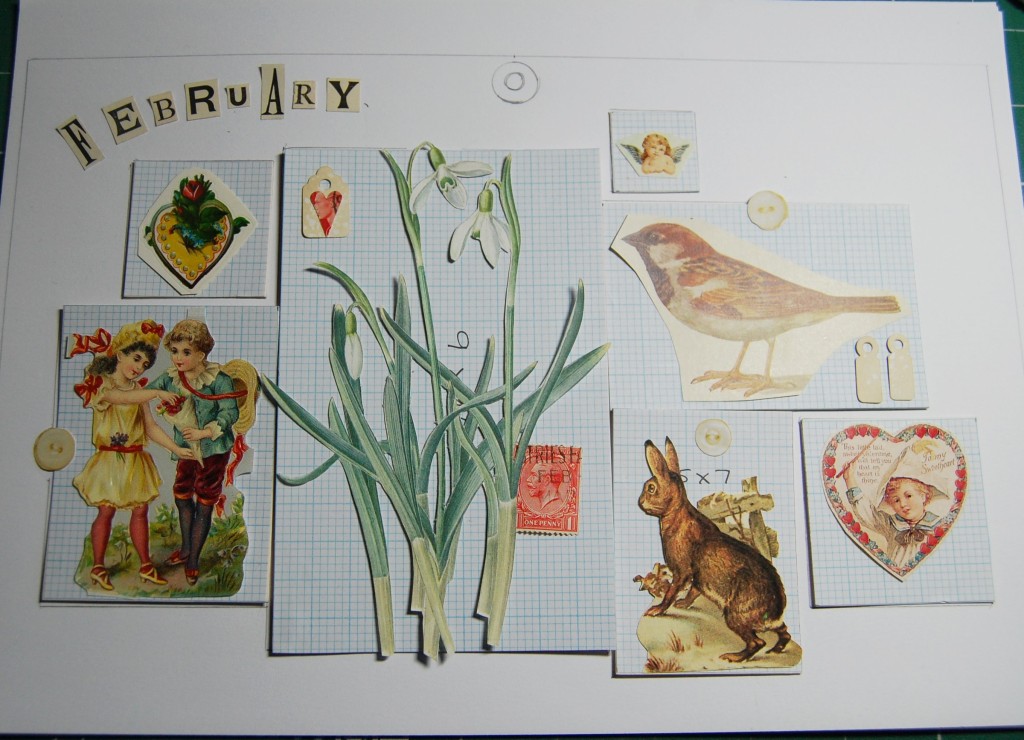
So, having established there are ‘decorative’ pages and ‘date’ pages, this first part focuses on the February decorative page – basically, things you would see in the month of February.
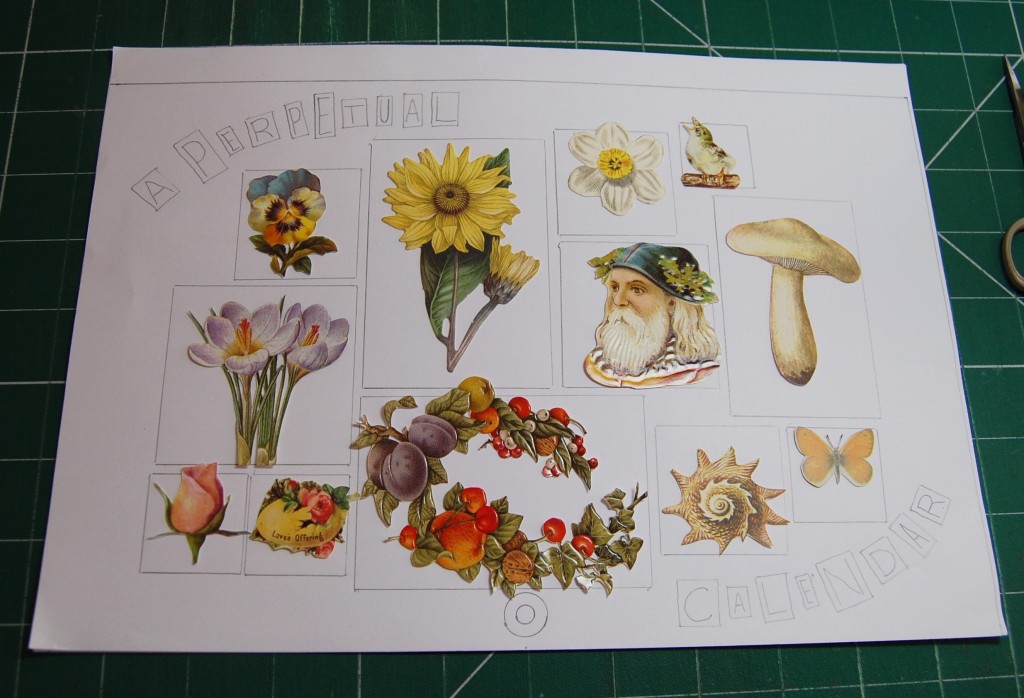
On a piece of A4 copier paper I drew around the page template I had made, then looked for appropriate images to use. I have a large collection of old books full of flower and wildlife illustrations, and a vast collection of Victorian scraps which I gathered together to find the images I wanted. Thinking also about calendar events for the month of February, I wanted to include something for Valentines Day. This would be something to think about for other months too.
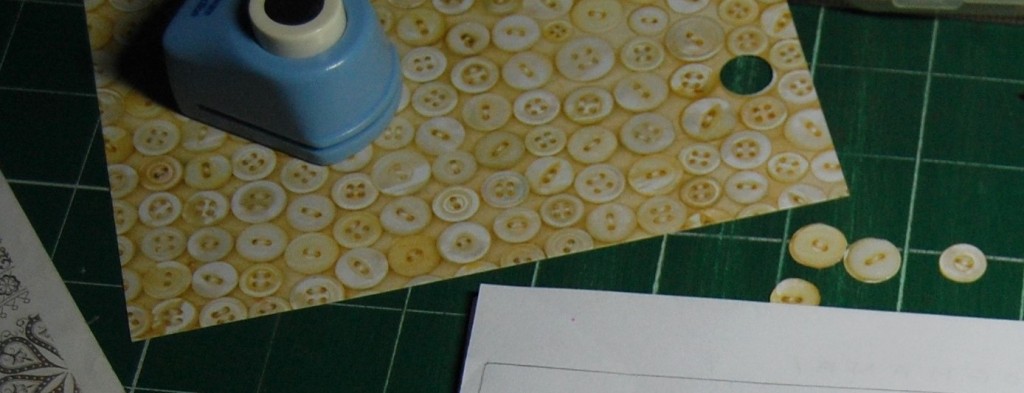
Button paper for cutting and punching.
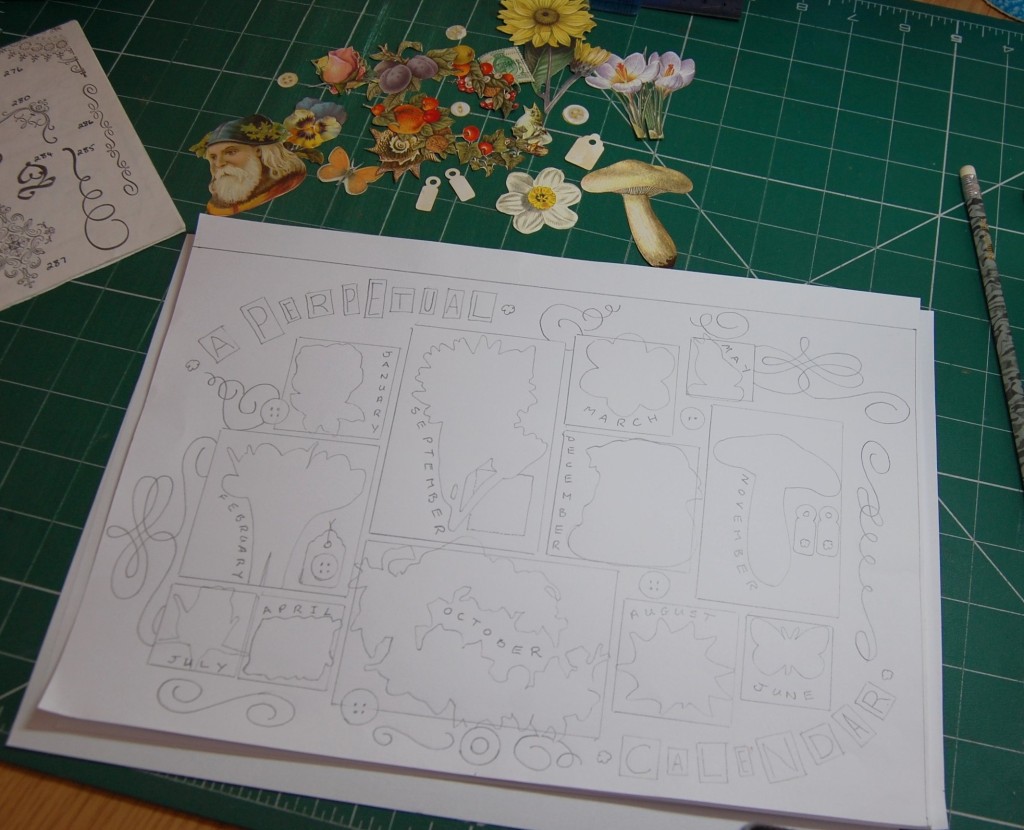
Once I had chosen a number of images I set them out on template blocks (that I made myself in various sizes from card and graph paper), to get the overall composition right. Some mats were placed so they were touching each other, while others were placed with a gap around them. I also thought about little details I could add to every page that would pull the whole calendar together. I chose old stamps, tea dyed tags and paper buttons – everything would need to be as flat as possible, so no real buttons could be used. I had some sheets of K&Co Life’s Journey button paper (above) which is ideal for punching and cutting out individual buttons.
I also decided on the title letters of each page at this stage. I used random letters cut from advertisements in a Victorian magazine. Below is the raw design as it looked at this stage.
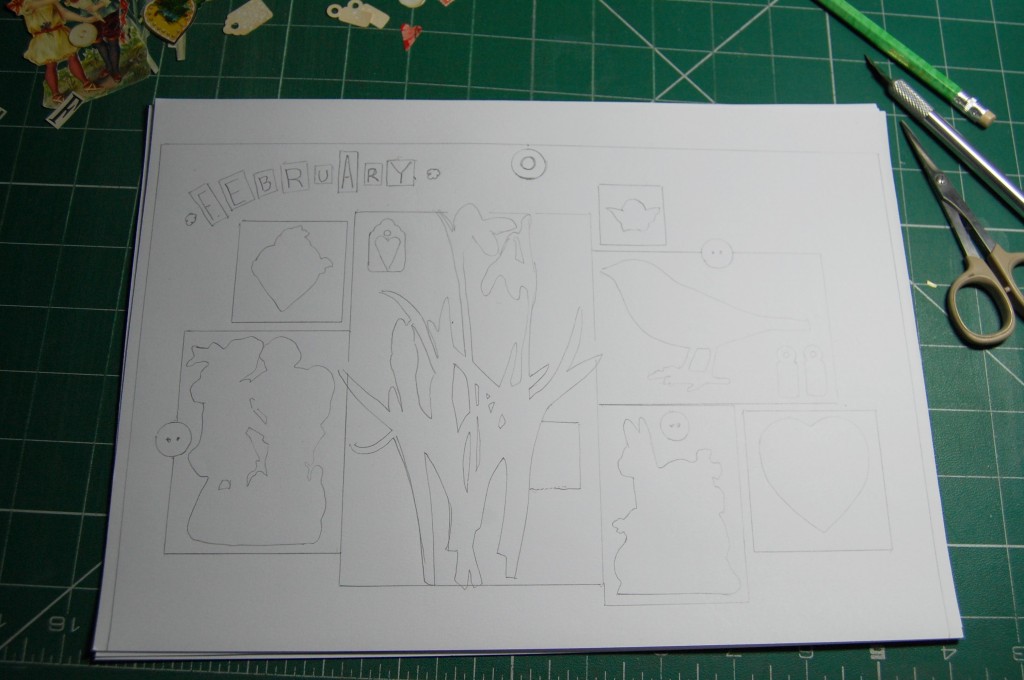
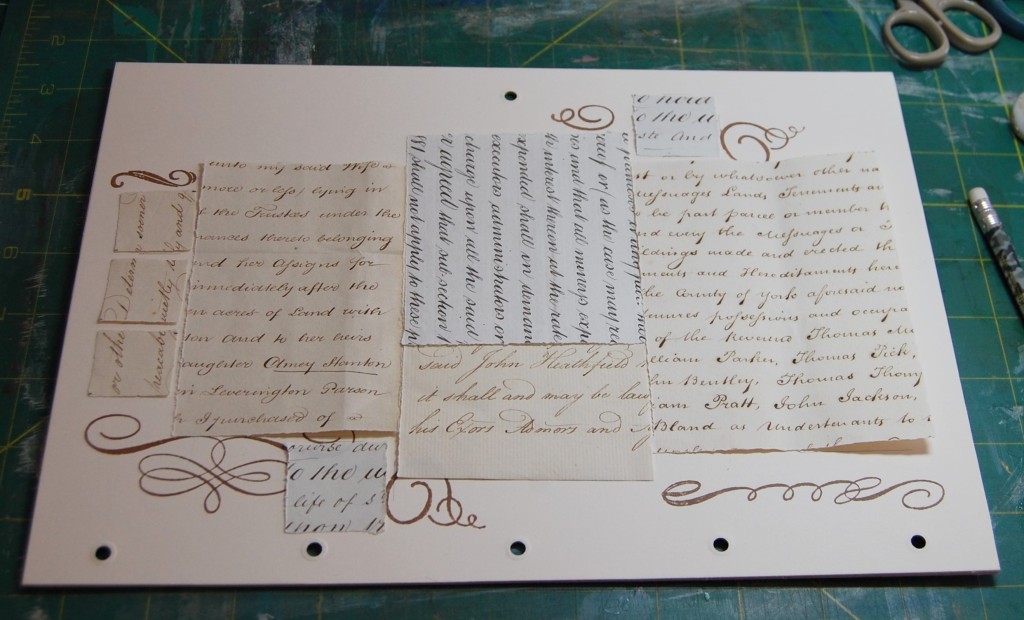
First stage of designing the February decorative page.
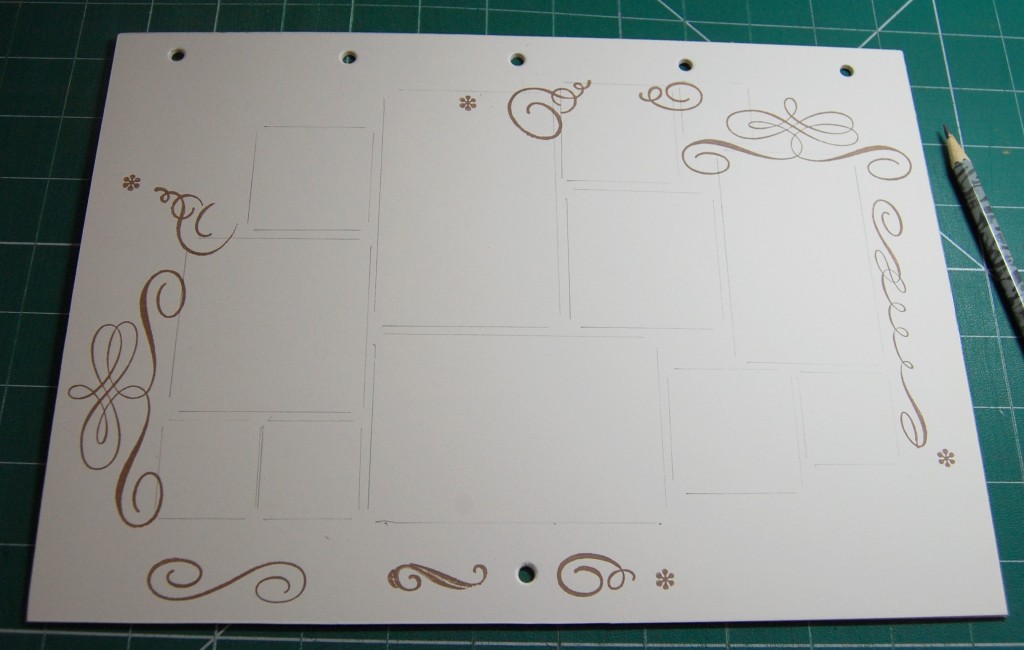
With the composition planned, the next step was to finish cutting around the images and then commit the design to paper. I drew around all the templates first and then the images, so I would have a record of where they were meant to go. The circle at the top of the page indicates where the hole would be punched on the finished page.
Transferring the design to paper.
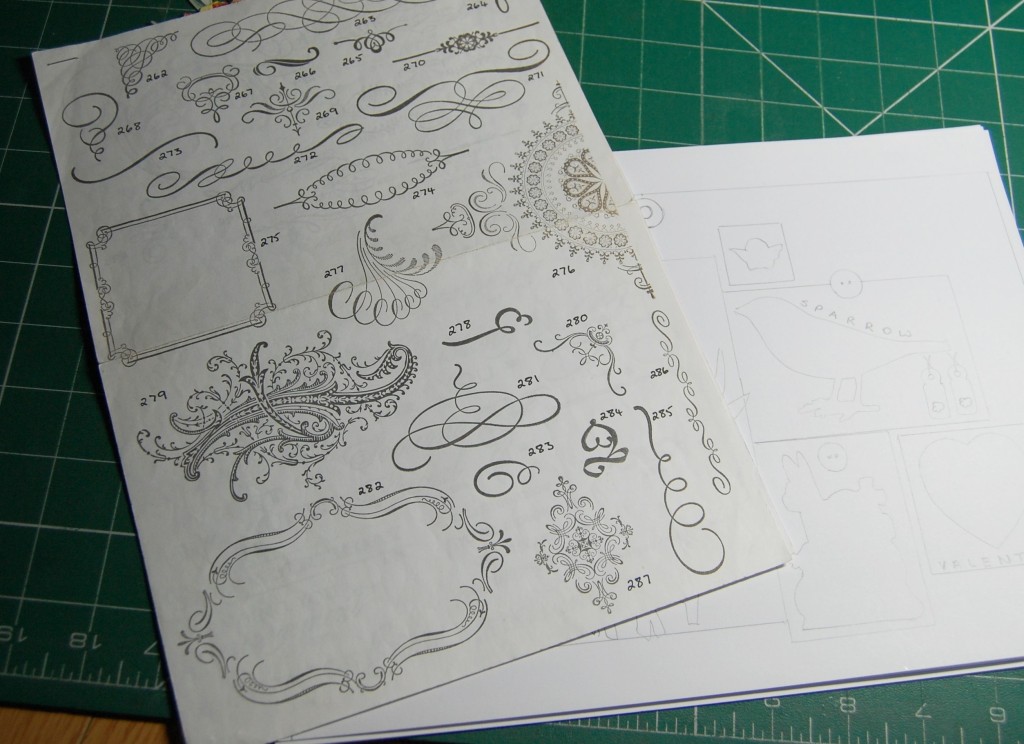
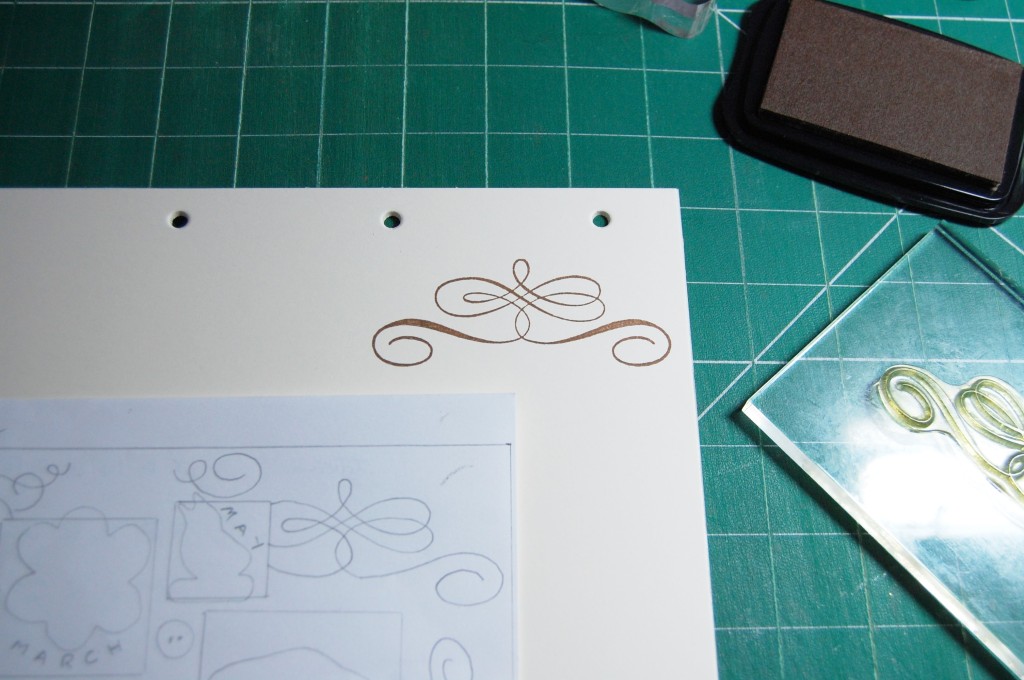
As I would be adding some stamped images to the plain parts of the page it was necessary to choose the stamps I would be using and decide where they would be placed. I have a few sets of Anna Griffin scroll and accent stamps, and when I first purchased them I stamped one of each image on to sheets of paper so I can see at a glance what stamps I have.
My sheets of stamp samples.
The great thing about making a sample sheet of stamps like this is that you can use them under your design sheets to trace the images on to your design to really see how they will look. So, by tracing the images on to my design at this stage I was able to avoid the areas which would be covered by the script paper mats and plan where they should all go. I chose seven stamps in varying sizes and these seven would be used on every page in differing positions.
Tracing a scroll onto the design sheet.
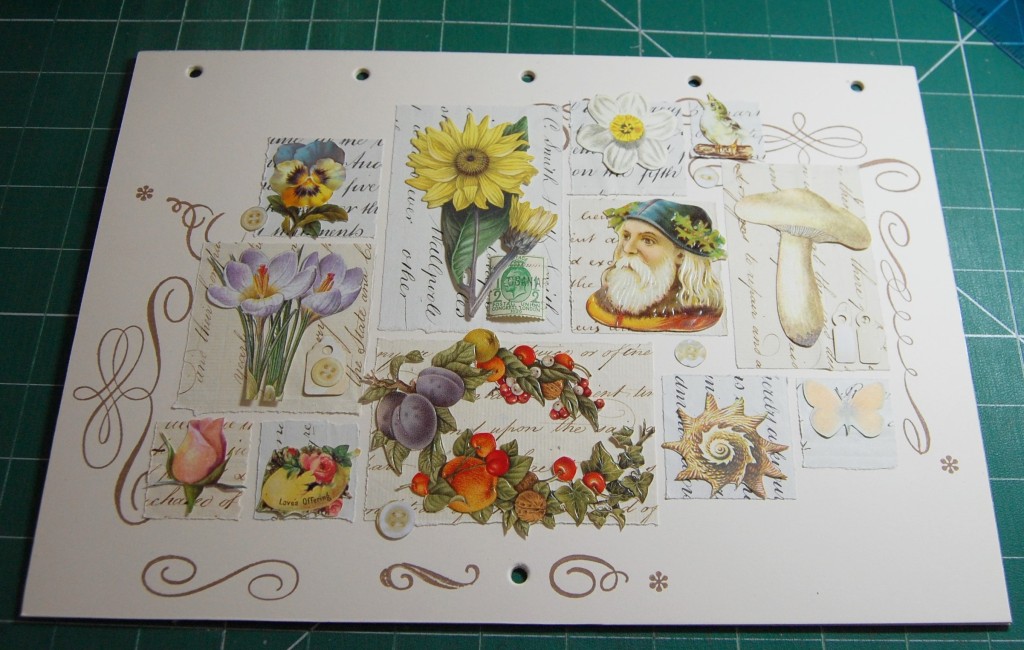
With the scrolls added to the design, it was just a case of adding some ‘words’ to some of the images. These would be made up of individual cut letters and stuck in the positions indicated on the design. The design of the February decorative page was now complete.
The finished design.
Designing a Date Page
Thought processes for the date pages included printing off sheets of calendar pages from the internet, or making my own on the computer to print off, but in the end I knew I wouldn’t be happy with them unless I constructed them like I do everything else, with mats and cut numbers. I knew it would be time consuming and absolutely loads of numbers would be needed, but the end results would be worth it. As it was a perpetual calendar there would be no need to add days of the week as days and dates change every year.
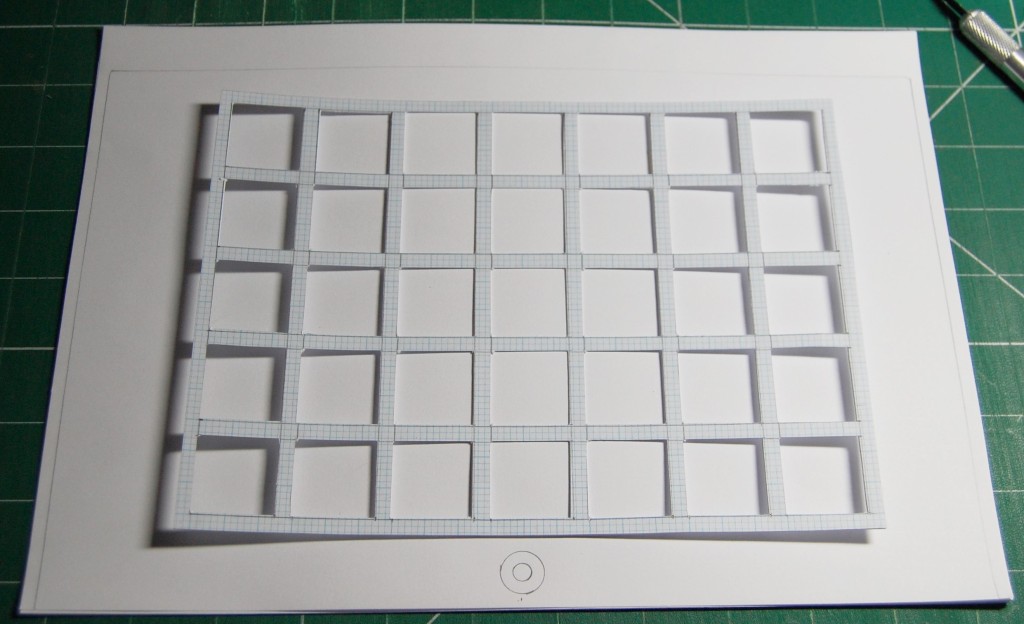
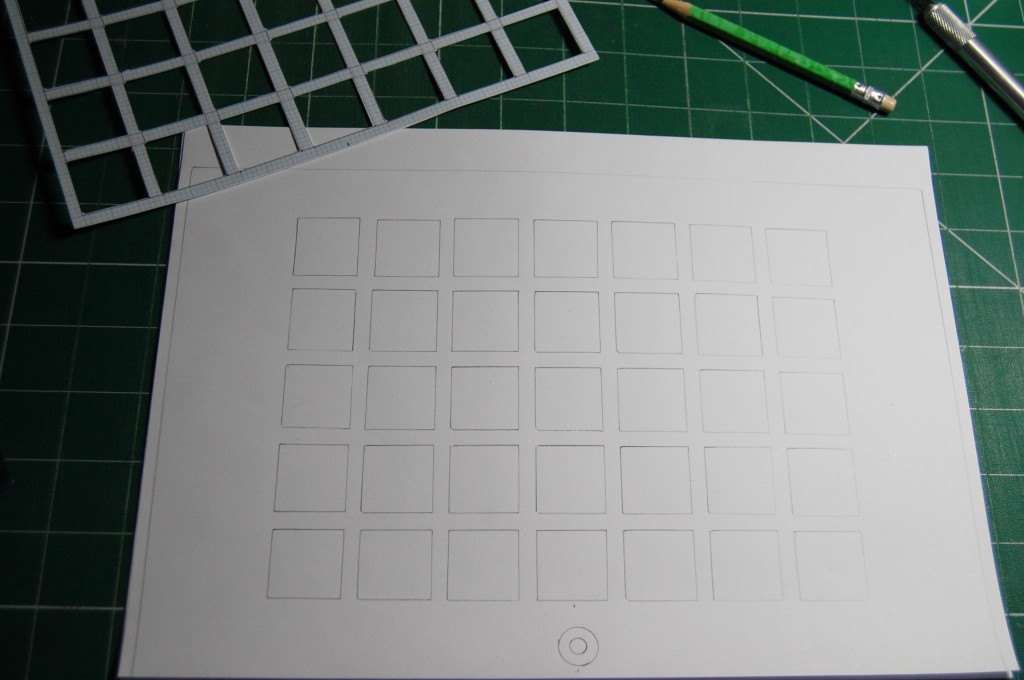
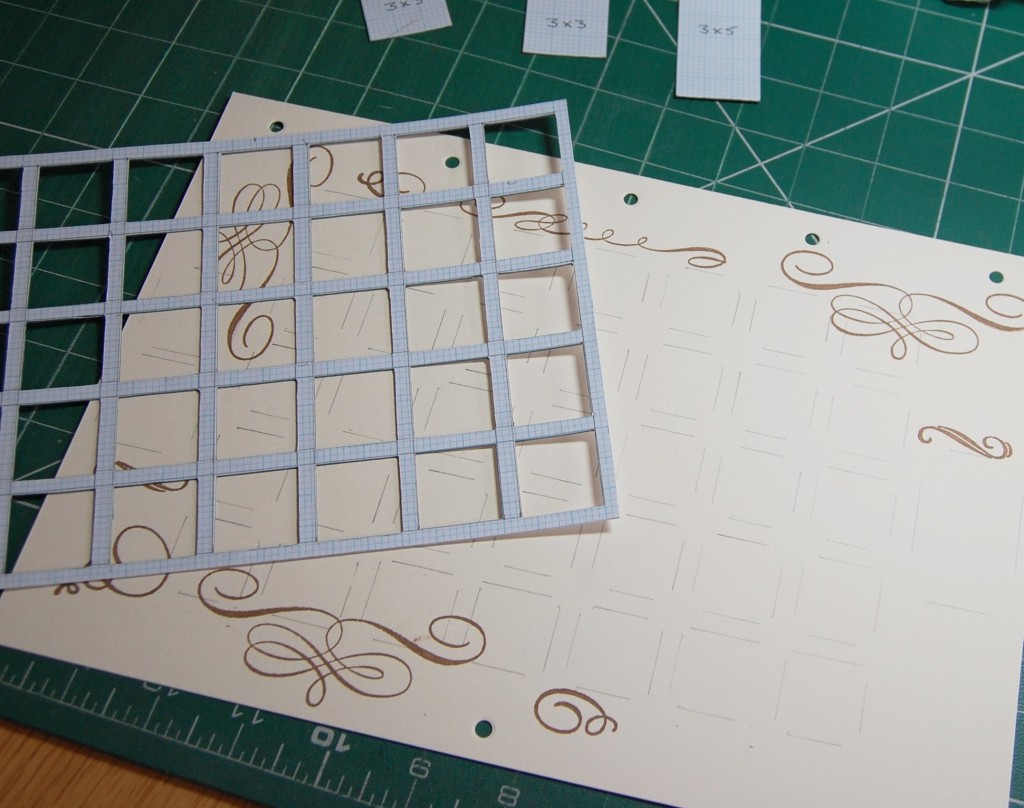
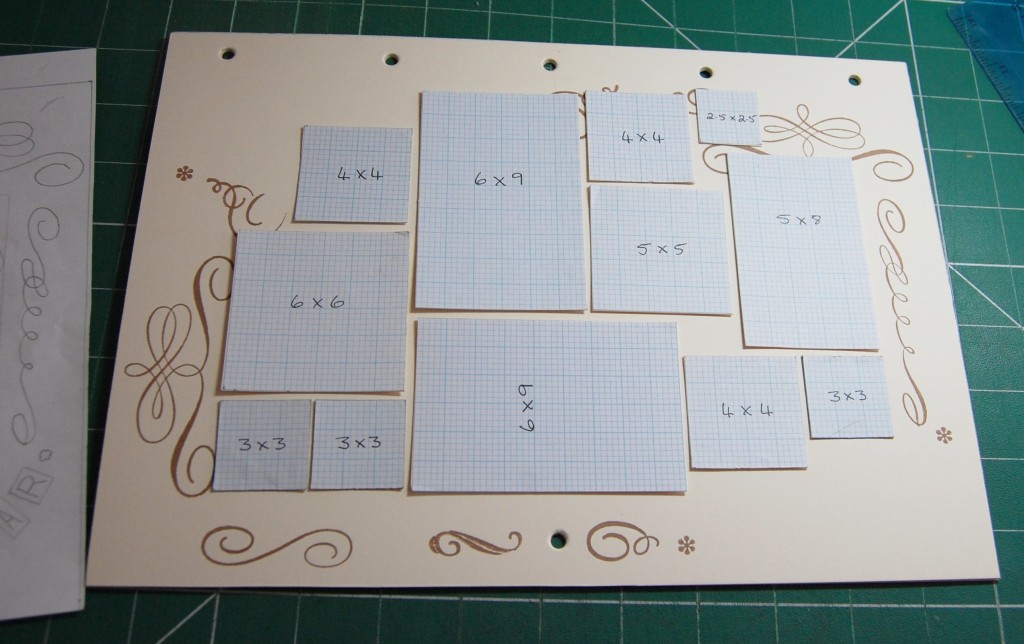
I decided to stick to the script paper mats which would match in with those used on the decorative pages. I would need a grid of 35 small mats to make it look even and accommodate up to 31 dates; the left over squares could then be used for little details like the stamps, buttons and tags used on the main pages.
Each mat would need to be 2.5cm square and 5mm apart from each other, this would then leave a decent sized border around the edges for stamping and additional mats. To ensure the grid would be as accurate as possible across all pages I decided to make a grid template out of card and graph paper, this could then be just placed on the paper and drawn around.
Making a grid template.The grid template cut out and ready for use.A design sheet with the grid transferred to the paper.
Number Crunching
The next problem to solve was to decide where the numbers would come from and what they should look like. Normally I would cut letters and numbers from old books, adverts or magazines, but that just wasn’t feasible with so many numbers required – I would have to print them myself.
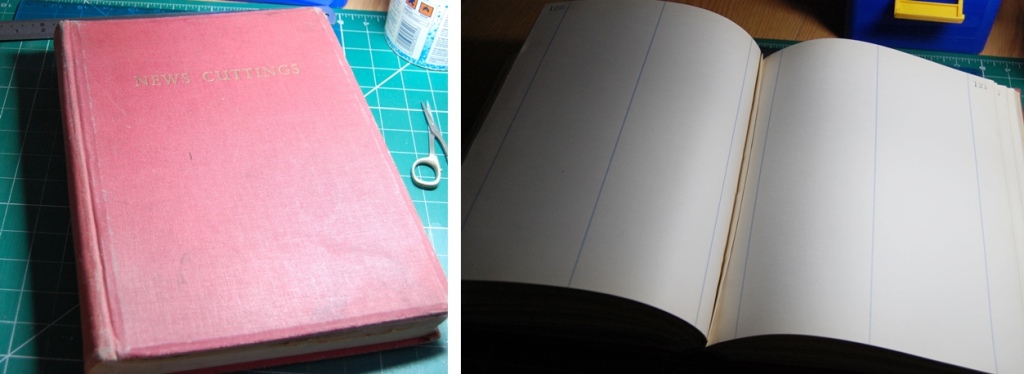
The best way of doing this to make them look authentic would be to choose a heavy, old style font and print onto aged paper. Luckily I had an old cuttings book (bought from an antiques fair), which had lots of unused pages in it. Yes, there were a couple of blue lines on each page, but any numbers printed on the lines could be discarded. The paper was also a nice heavy quality and the creamy colour gave it the aged look I was after.
The cutting book and it’s unused pages.
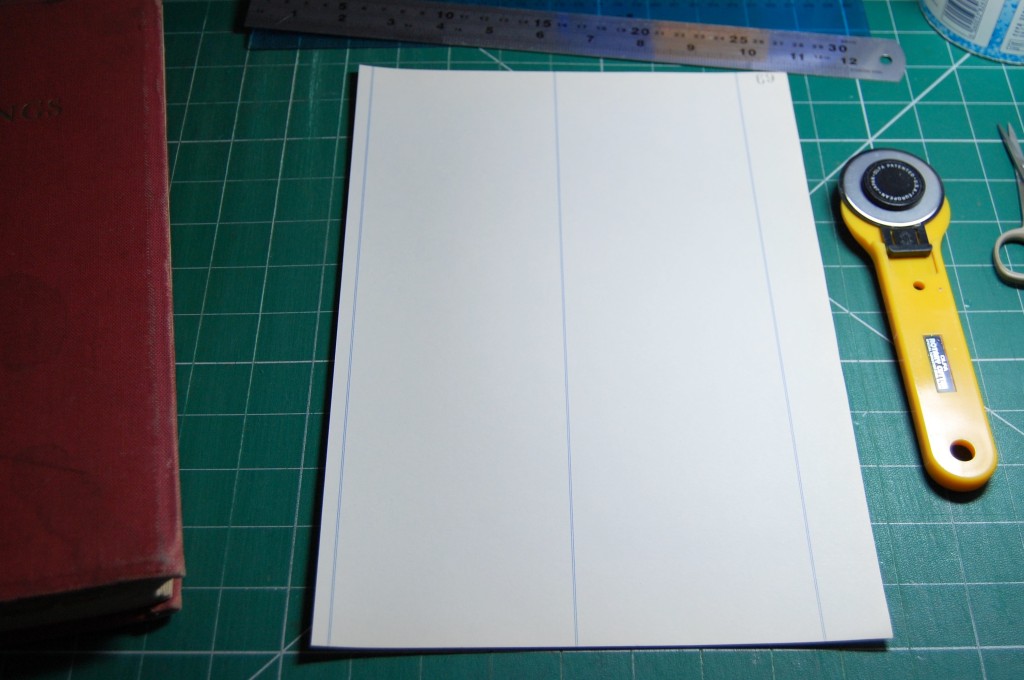
The pages of the book were larger than A4, so it was just a case of removing a few pages and cutting them down to A4 so they would run through my printer.
One of the pages trimmed to A4 size.
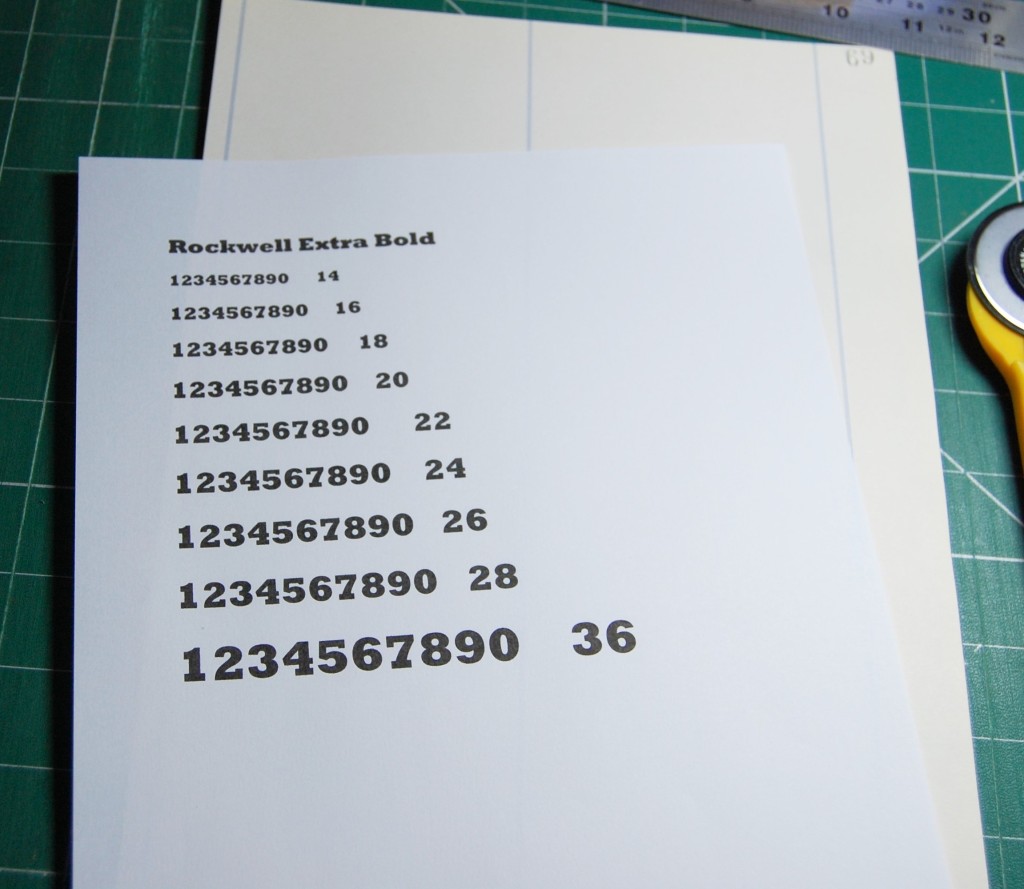
Next, in Word I chose the font I wanted to use, ‘Rockwell Extra Bold’, and printed it out a few times in different sizes to try out on the mats.
Number samples.
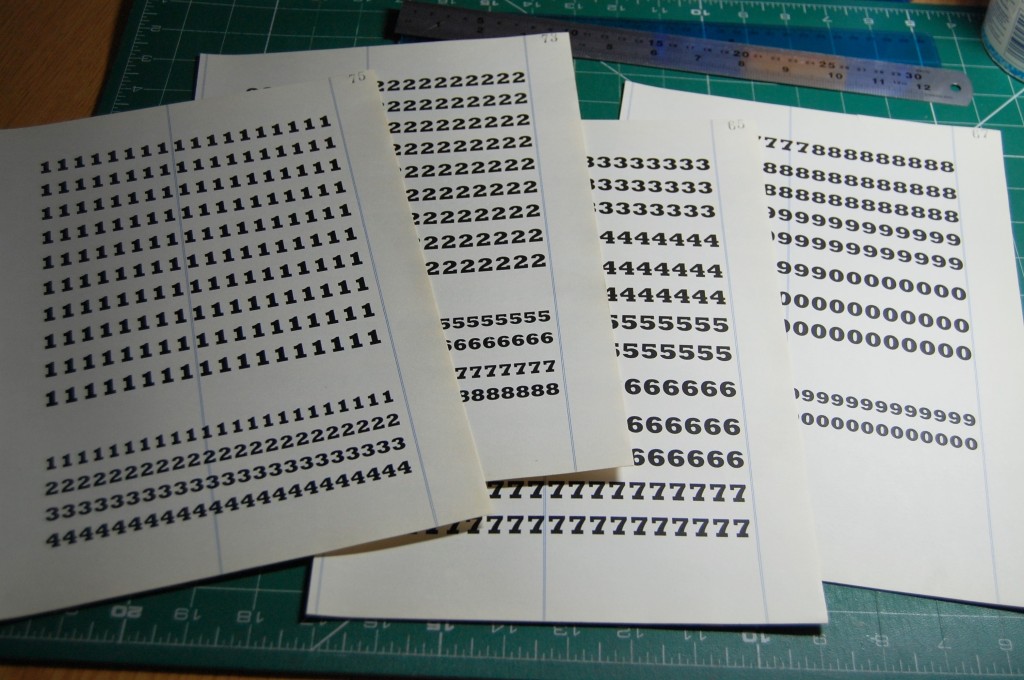
The size best suited to the mats was the 36 count (largest), but I would also need some smaller numbers for using over date specific images, such as over a Valentine’s heart for the 14th of February, or over a Christmas image on the 25th of December. So I decided to print out some of the 28 count numbers too. I had already worked out roughly how many of each number I would need, ensuring I didn’t print too few, or go completely over the top and print too many. I printed a sample sheet of numbers first to make sure they were what I wanted, then I printed them on the cut pages from the book.
The printed number sheets.
Once the numbers were prepared it was just a case of finalizing the design. I decided to put the first three numbers in the centre of the top row, that way, if a month had 31 days, the remaining squares on the rows below would all be filled with numbers. Shorter months would have a spare square or two at the end to be filled with decorative details. Extra mats were added to each side of the date grid for images to be placed in. Stamping would be added to mirror that on the decorative pages and a title added to the bottom right corner.
Finished pencil design of the January date page.
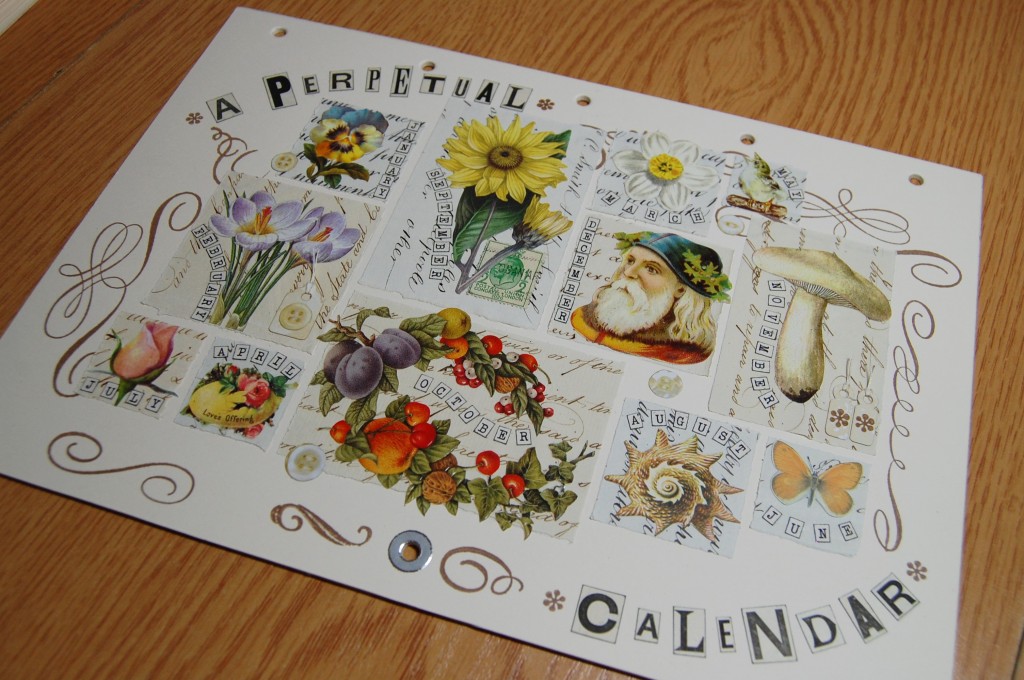
The Front Cover
For the front cover I wanted to represent each month of the year with an appropriate image and make the design similar to the inside designs. Once again I chose to mat on script paper, but instead of some mats touching, I decided to keep a small gap between them all. This meant the front cover would look slightly different, but still fit with the other designs.
Deign for the front cover in progress.
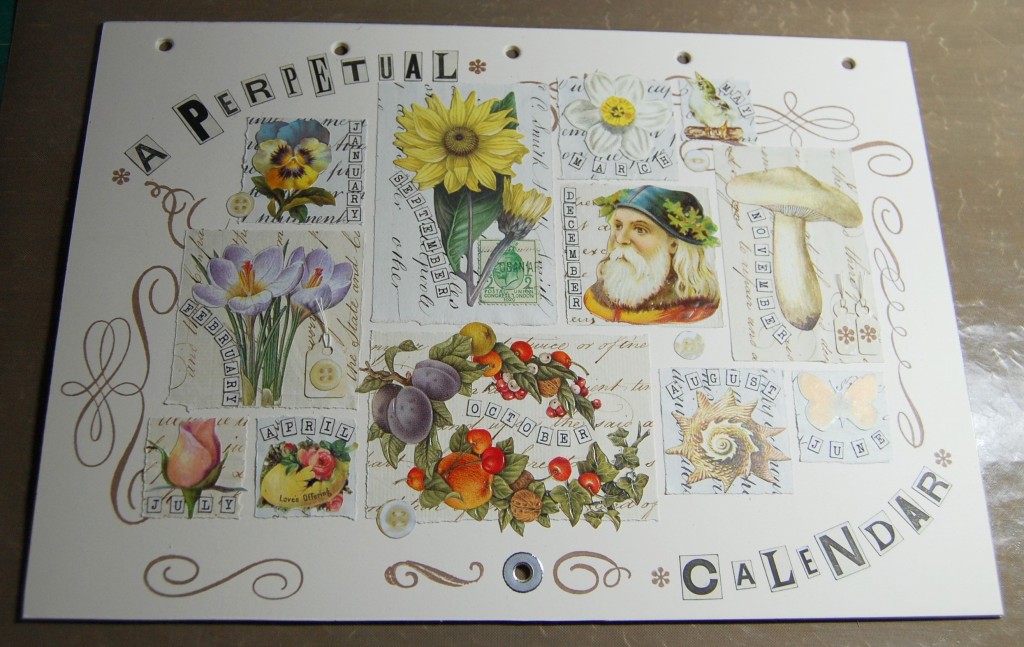
I started out by playing around with different shapes and sizes of templates until I had twelve potential blocks in a composition I was happy with. I then sourced images for each block as in the photo above. I then picked out some random letters for the title which was placed around the two opposite corners like on the inside pages.
The finished design.
The photo above shows the finished design. The stamping positions have been added along with more of the little details from the body of the calendar, like the tags, buttons etc. Each image has a label too spelling out the name of it’s month.
The front cover was the last part to be designed and once complete it was time to move on to preparation.
Preparation
I like to have all the preparation done before I start making up my project, so as I designed each page all the cut out images were stored with the design in A4 files inside a ring bound folder. The first stage was designing each page and once that was done I moved on to preparing all the script paper mats.
My design folder and the script paper which would be used for the mats.
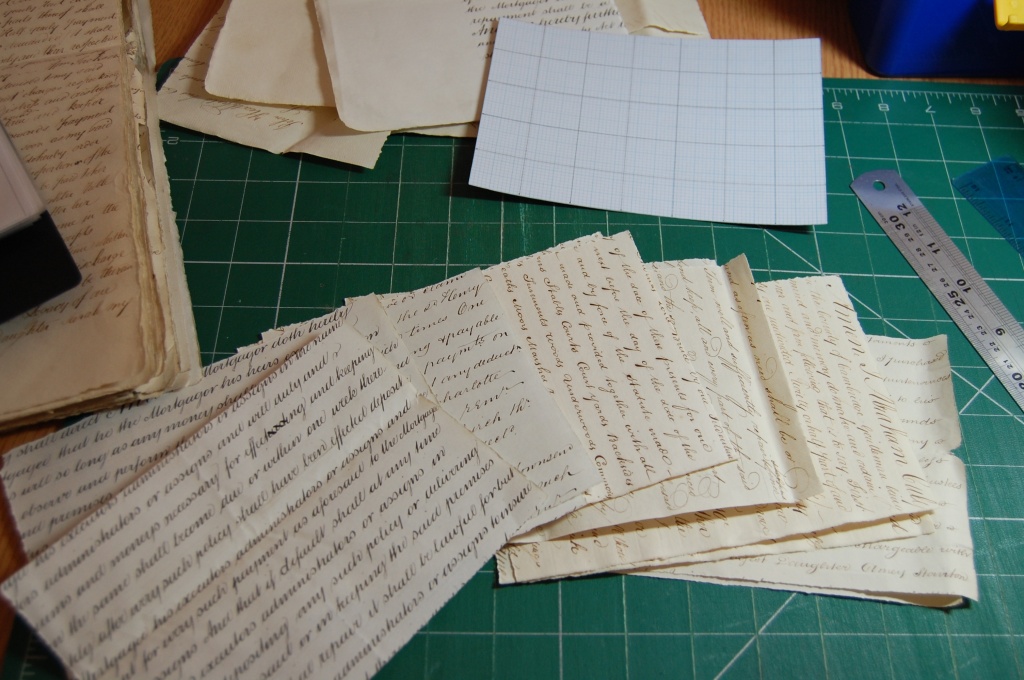
I have a large collection of old hand written legal documents which consist of lovely, thick, heavyweight paper, ideal for mat making. I decided that torn edges would look softer and more natural than completely straight, cut edges and the easiest way to do it would be to batch prepare all the mats I would need across the whole project.
Preparing a batch of papers for tearing into mats.
I started with the dates pages, and with thirty five 2.5cm squares required for each month, I cut a card and graph paper template measuring 17.5cm by 12.5cm. Using the template as a guide, I made twelve mats from a selection of six different papers. Each one would then be torn into 35 smaller squares.
Tearing the paper into 2.5cm squares.
Using a steel ruler held on top of the paper makes it easier to tear against and gives a relatively straight, but soft edge. I tore strips first, them reduced the strips to squares. I continued in this way until all twelve papers had been torn into small squares. In all 420 squares were torn for all the date pages.
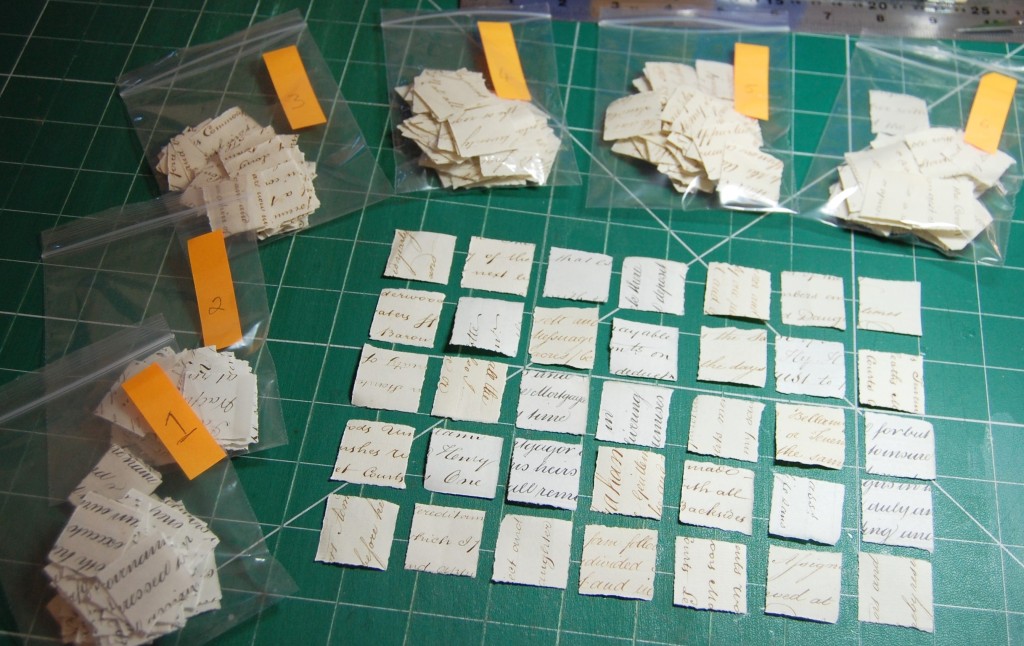
Small squares bagged up after tearing.
As I mentioned earlier I used six different papers for the mats, and as I wanted to ensure there would be an even mix of them used on each page I bagged up each type and numbered them 1 – 6. I would then take six squares from each bag and set them out on the grid randomly, facing in different directions, and put the remaining square back in the bag (because 6×6 = 36, and only 35 were needed). This probably sounds quite complicated, but it really isn’t if you do the working out properly before you start.
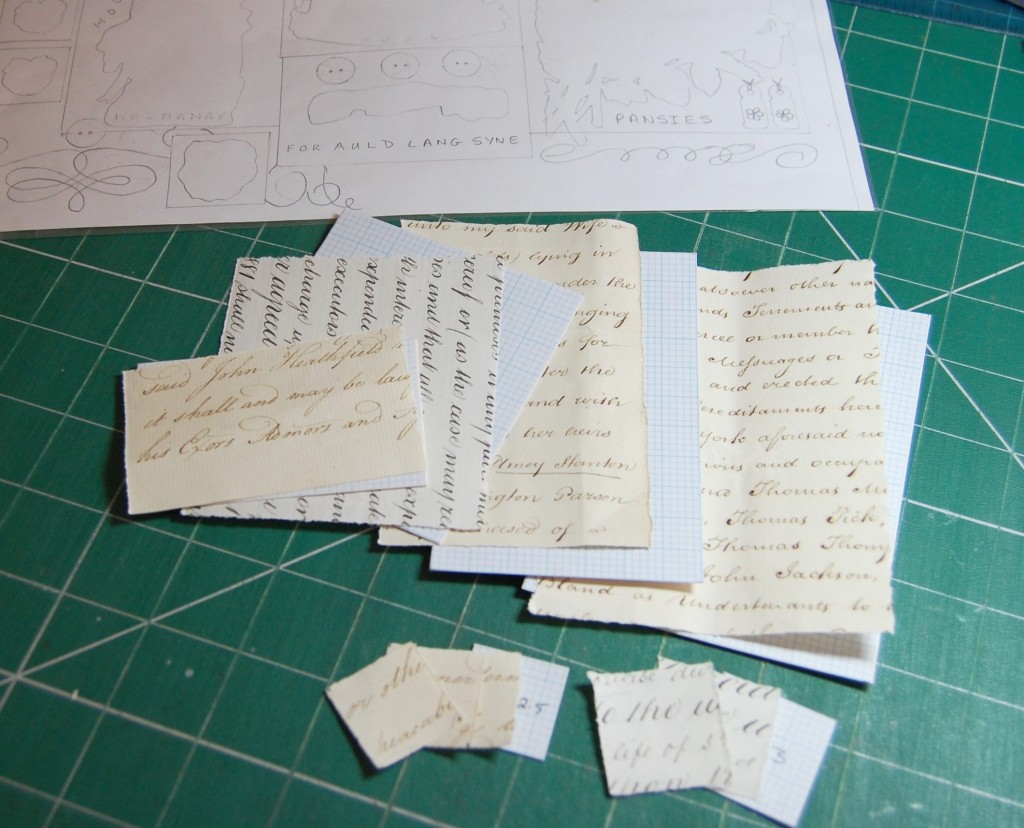
Once the small squares were prepared it was time to move on to the other mats – three larger ones for each date page and then all the mats for the decorative pages.
Prepared mats for a decorative page.
Using my card templates as a guide, each mat was torn to the correct size, and when set out, mirrored the design drawn earlier.
Mats for the January page set out in same way as the design.
Little Letters
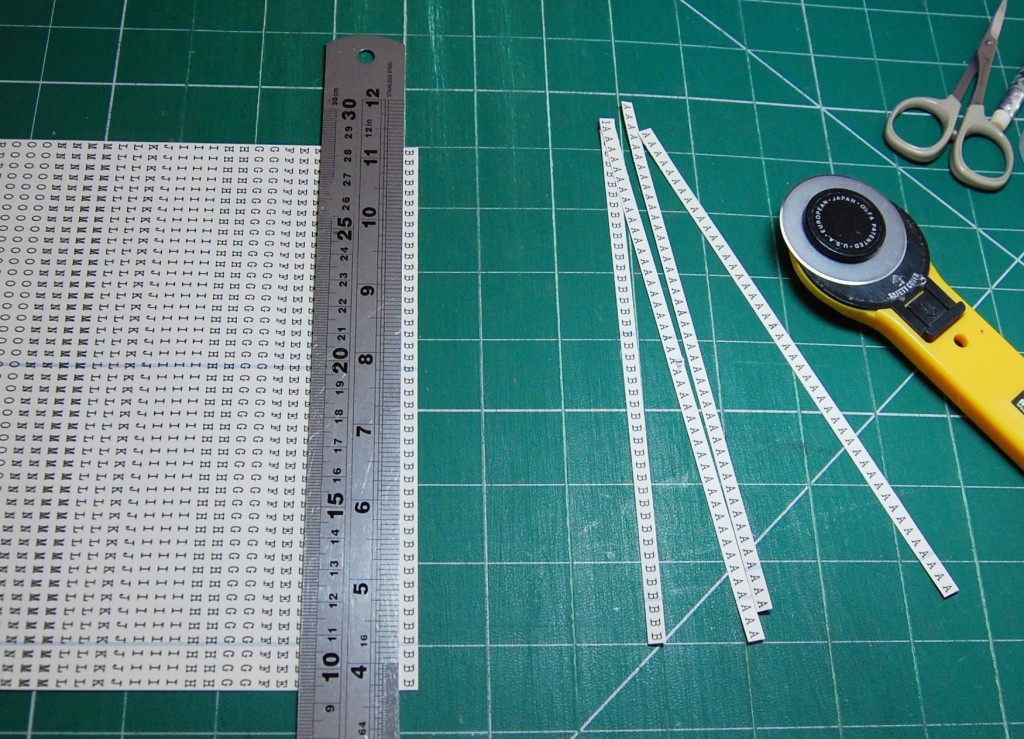
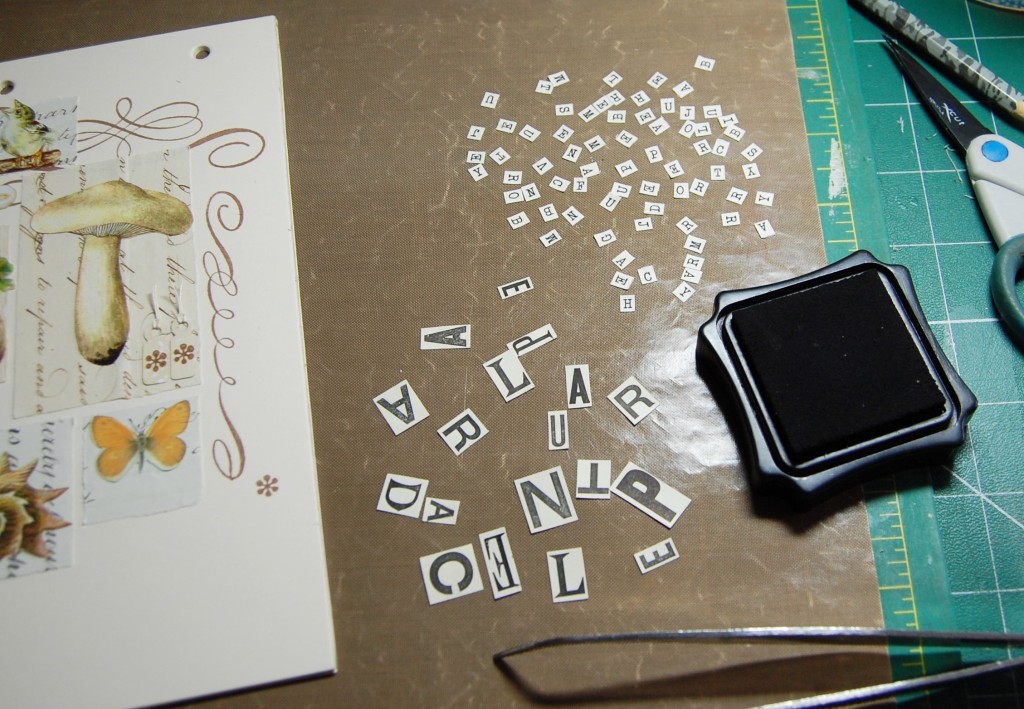
The next thing to do was to prepare all the small letters for the words on the calendar. Normally I would cut individual capital letters from old children’s books, but I wanted them to look similar to the number tiles I’d made. So I typed out some alphabet sheets in an old typewriter font and printed the sheets onto more of the book pages I had used for the numbers. These were then cut into strips using a rotary cutter and steel ruler. Then individual letters could be snipped off to make the words.
Cutting the printer letter sheets into strips.Making the words.
Making the Calendar
With a ring binder full of completed designs, mats, cut out images, letters and numbers all ready to go it was time to actually start making the calendar. So, out came the cream card, mount board and hole punch all ready to start.
Mount board and cream card ready for cutting.
For the front and back covers of the calendar I cut some white mount board (because I didn’t have cream) to A4 size. Mount board is thicker and stronger than ordinary card and is ideal for outer covers on book projects.
As the front cover needed to be cream, I covered both sides of one of the mount board pieces. The back cover would only need covering on one side, the inside, as this would become the December date page. The very back didn’t matter as it would always be hung to the wall.
I used A4 adhesive sheets to bond the cream card to the mount board.
Applying double sided adhesive to the card.
Once the front a back covers were prepared I cut cream card to the size of the template I made before starting designing. As both sides of the card would be used, eleven pages needed to be prepared, and with the use of the inside front and back covers that would accommodate all twenty four sides needed for the calendar.
Cutting the card for the calendar pages.
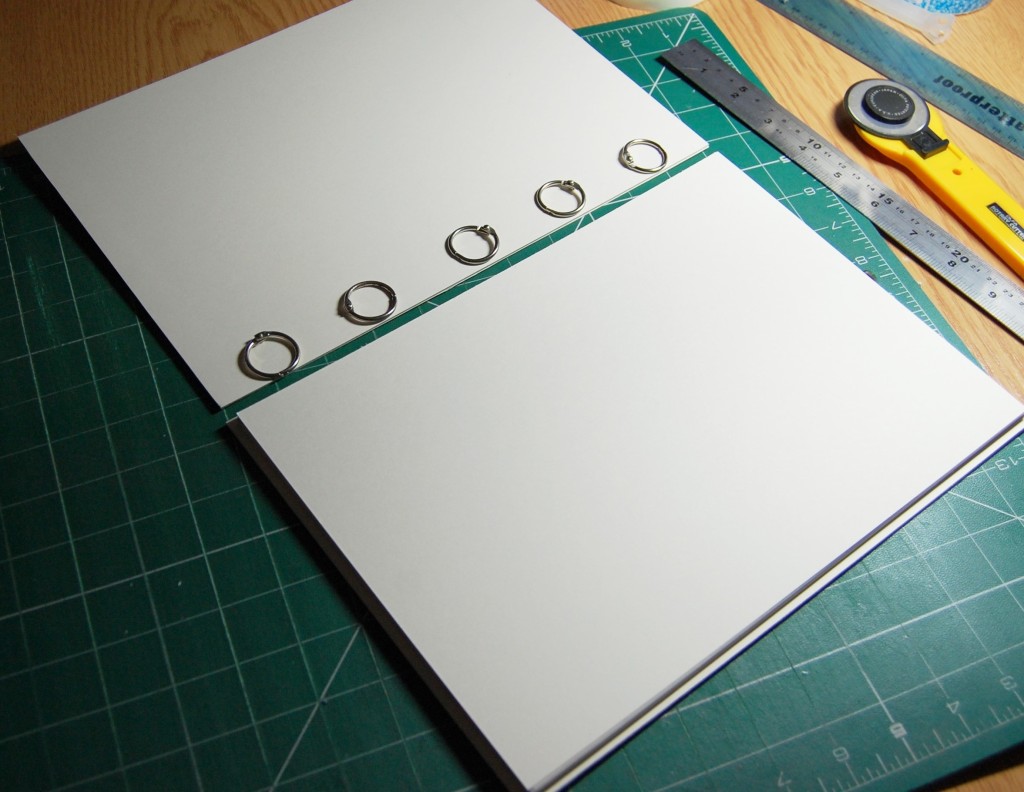
Once all the pages were ready I then had to decide where to place the book rings so I could punch all the holes in advance. I decided to use five book rings, spaced evenly across the long side of the card.
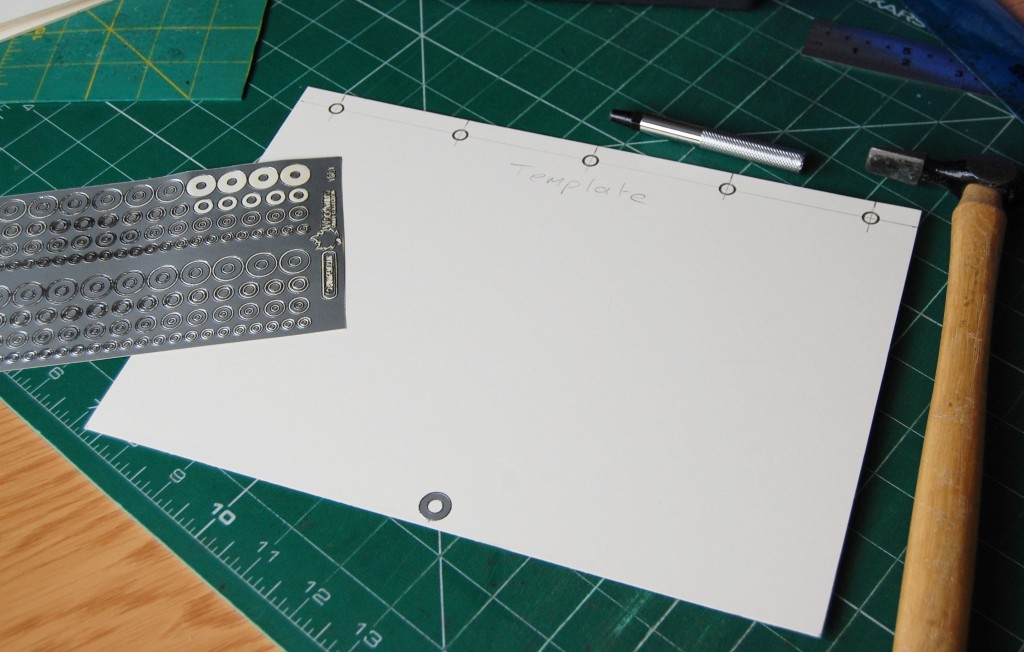
Measuring for book ring holes.
I used the template to make guide holes for the punching. I stuck some thin hole reinforcements where the holes would be punched. I could then punch holes in the template then use the template over the top of a page to punch through the guides.
Making the guide holes on the template.The template and a punched page.
When finished I had a stack of pages and two covers with perfectly in-line punch holes. I also punched the bottom holes which would hold each page open on the hanging nail.
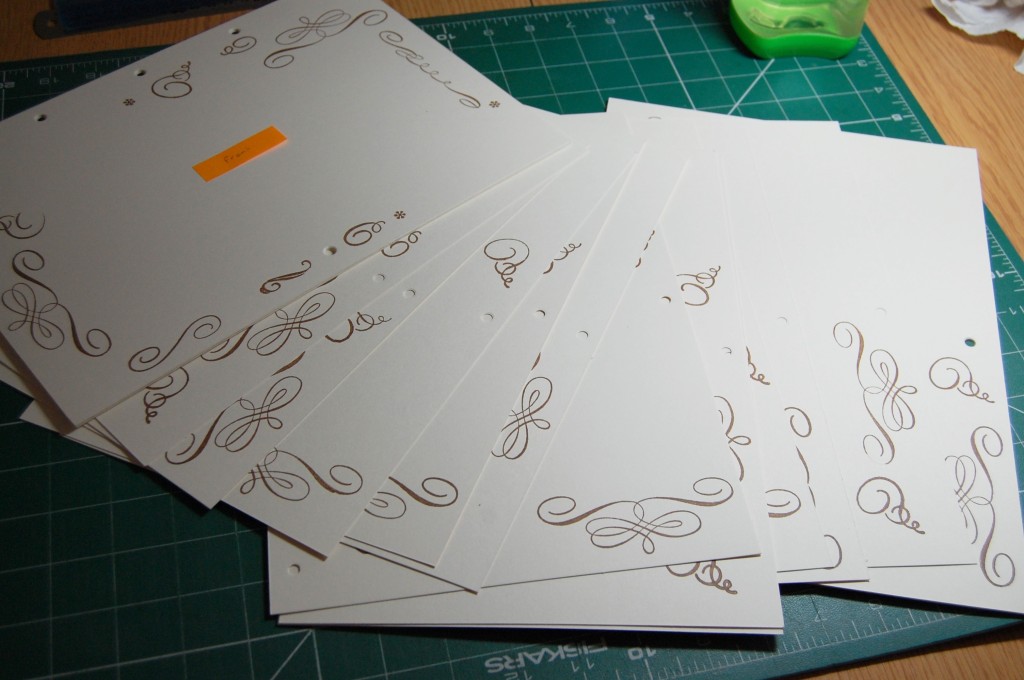
Stamping the Pages
The next step in the process was to pre-stamp the pages with the scrolls that would be partially hidden under mats. So, using my design sheets as a guide I stamped each image in vintage sepia ink. Stamping that wouldn’t be covered could be added later.
Stamping the scrolls.
Before long I had a pile of stamped pages ready for mats and images to be added. I added a sticky note to each page side indicating which month it belonged to (so I didn’t get them all muddled).
Pages stamped, punched, labelled and ready to go.
Making the Calendar
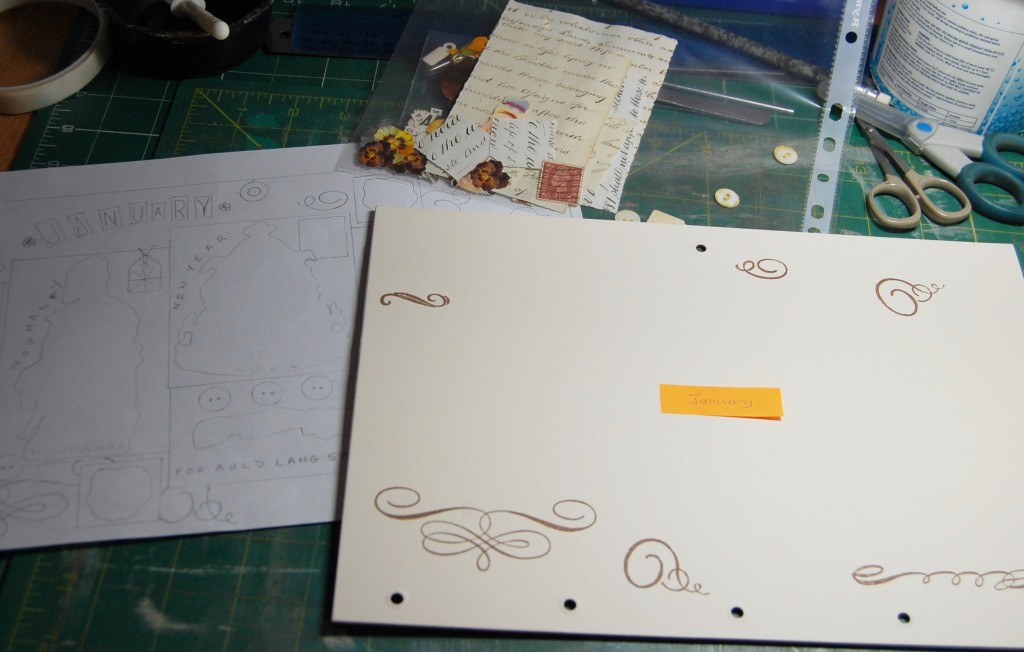
Here is a walk through then of making up the January pages for the calendar.
Preparing to make the January decorative page.
Taking the prepared decorative January page and the file with the all the images and mats in, it was glue and tape at the ready to get started.
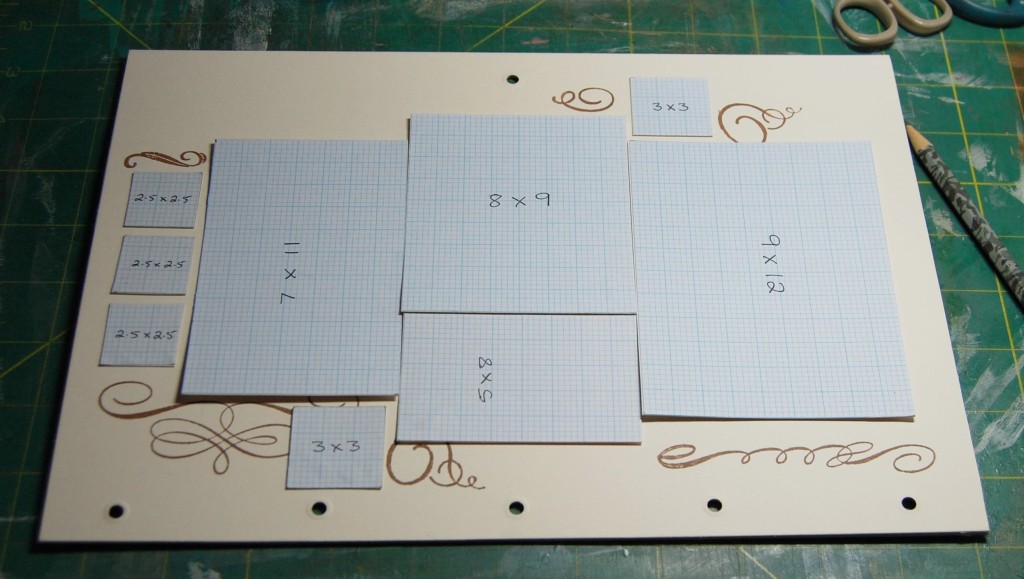
Laying out the templates.
The January page would be constructed on the back of the front cover. To mark out the positions of the mats I set the card templates out on the page and drew around them lightly with a pencil.
Pencil lines mark out the positions of the mats.
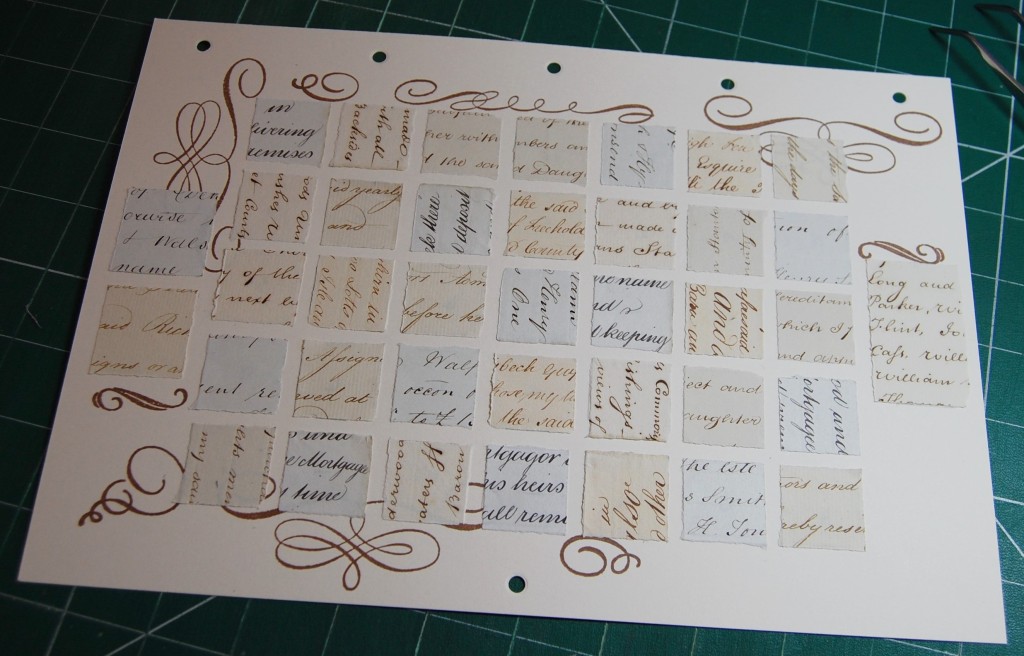
Using the pencil lines as a guide I set out the background mats in the correct places.
The mats positioned.
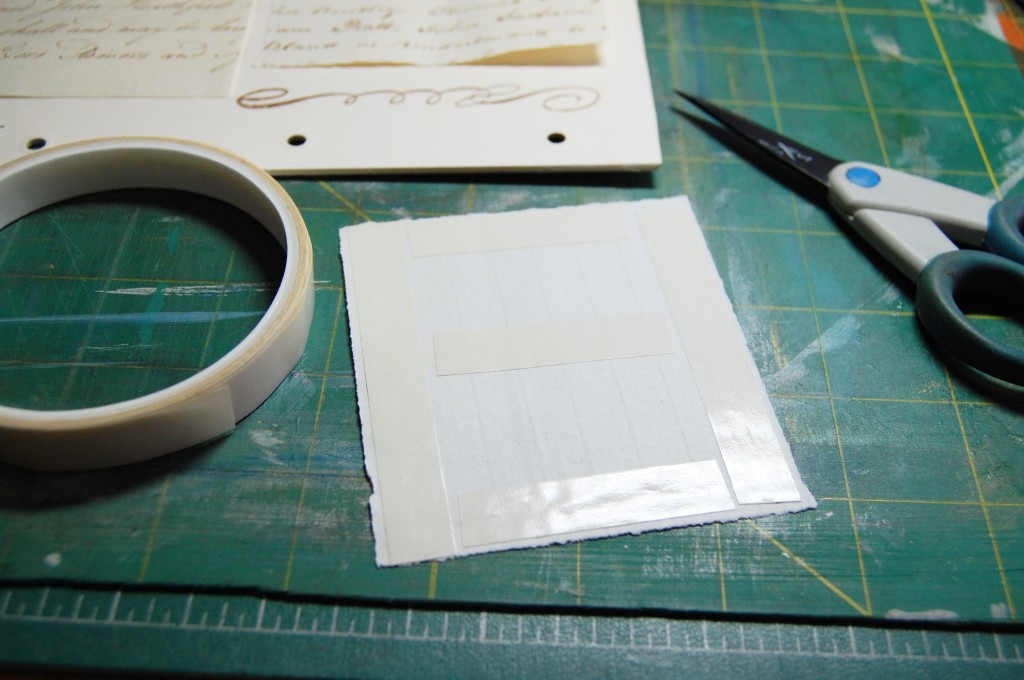
After this, each mat was turned over and double sided tape added.
Adding the sticky tape.
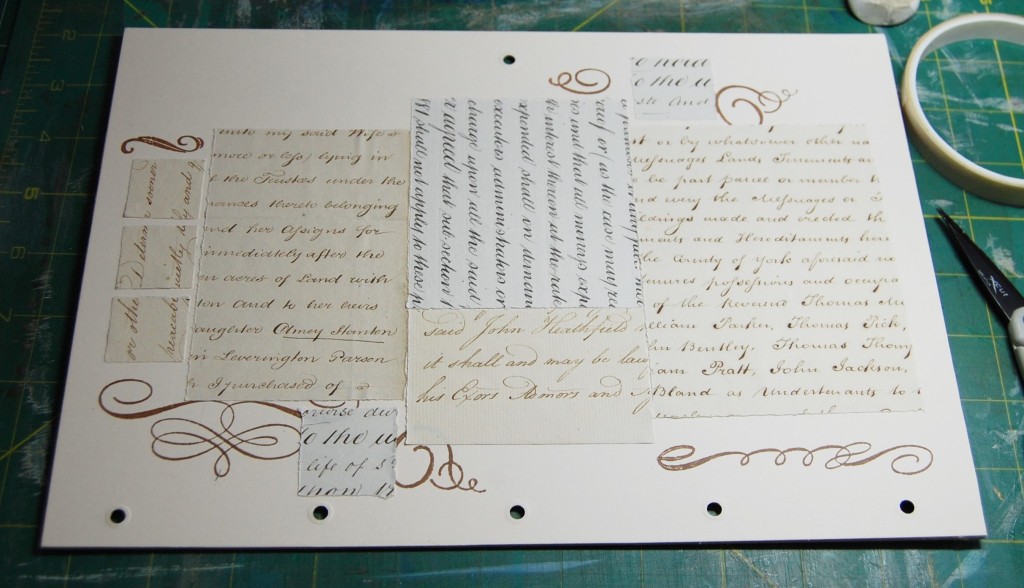
Before long all the mats were stuck down to the page. At this point the extra stamped scrolls could be added.
The mats all stuck down and stamping finished.
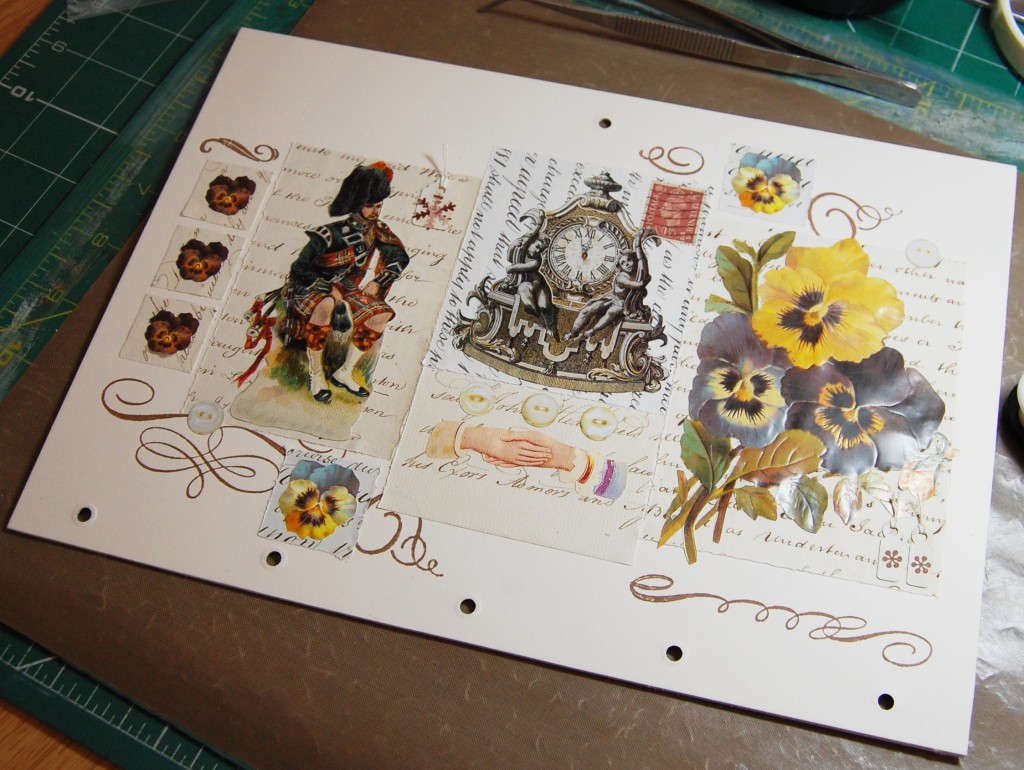
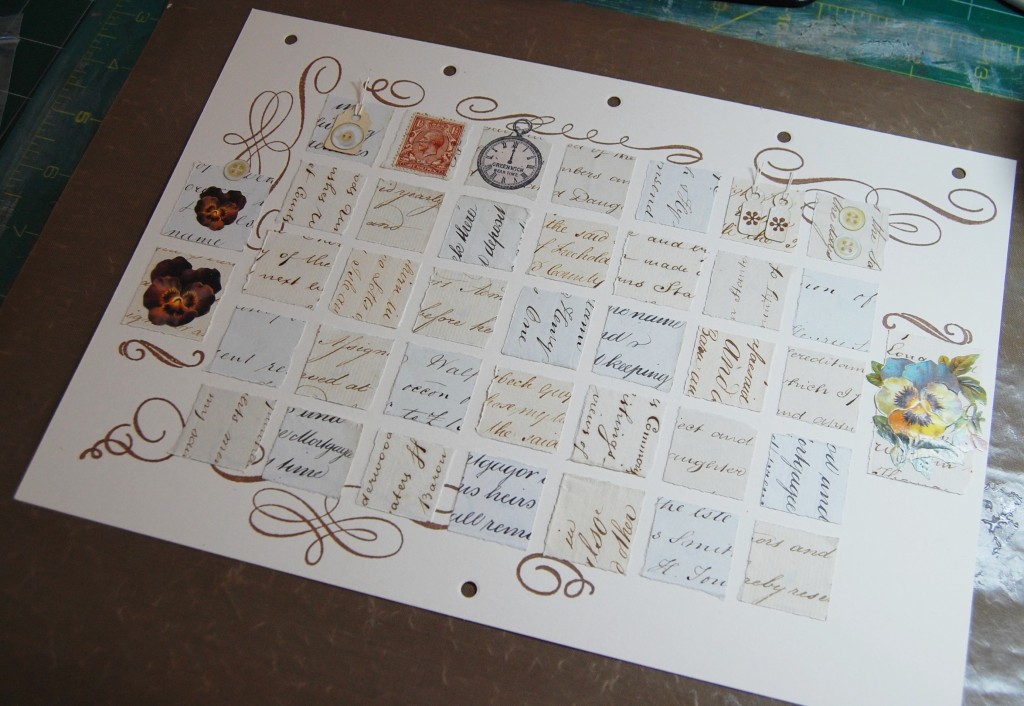
Next it was time to stick all the main images down. I tend to use a mixture of double sided tape and PVA glue on these items. If it’s a largish image I will put some tape in the centre areas and then apply a thin film of glue to the edges. Small images are stuck entirely with glue. A good pair of tweezers is very handy when positioning glued images.
Sticking down the images.
Once the images had been applied details like the buttons and tags went on next. I stamped a tiny flower on the smaller tags and added some linen thread to the holes.
The page with all the decorative elements stuck on.
Next it was time to place the title letters in an arc across the top left corner.
Placing the title letters.
As with all the cut out letters I use, I ink the edges slightly with black ink to help them stand out from the background.
Inking the edges of the cut letter tiles.
Once the letter tiles were inked, they were stuck in place on the page.
The title letters inked and stuck down.
As a finishing touch, a tiny flower was stamped at each end of the title.
A stamped flower is added each side of the title.
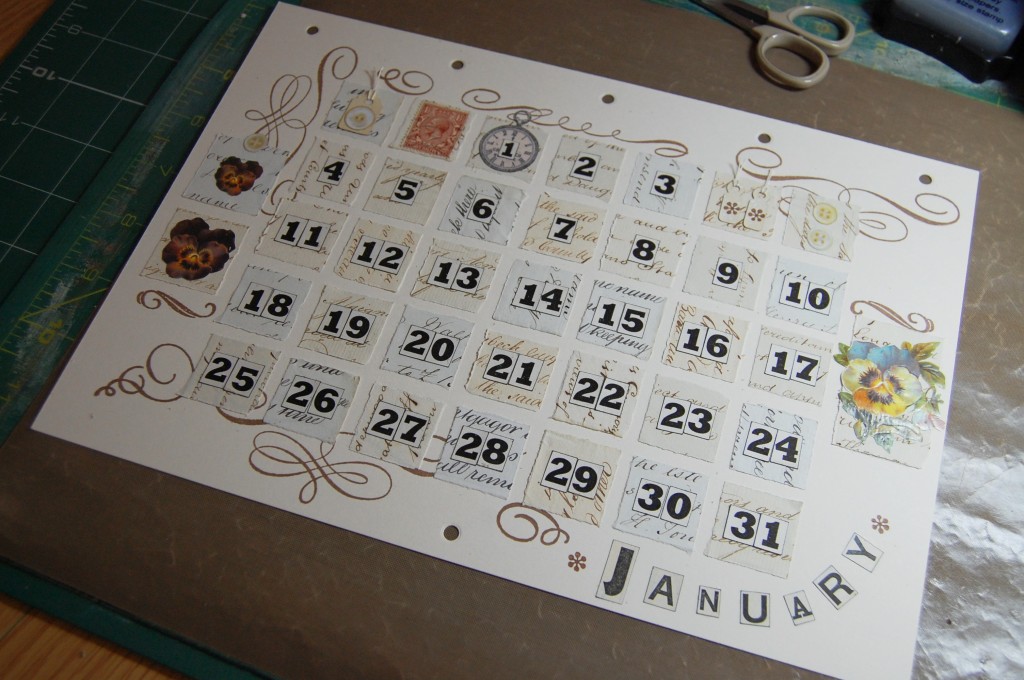
Finally, all the other lettering was inked and added to the page. The following three photos show different parts of the design now it was finished.
The finished page.
Making a Date Page
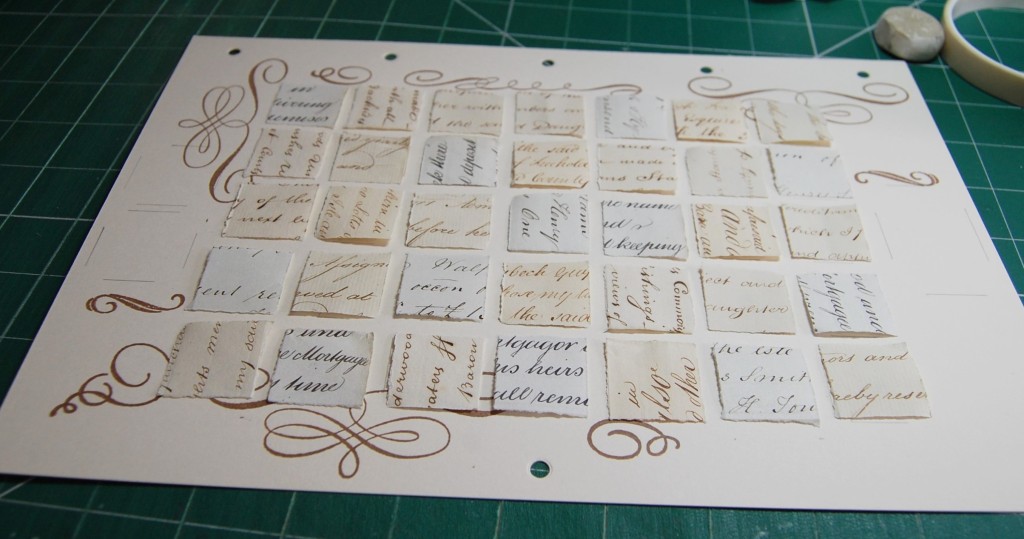
As with the decorative page, the first thing to do was to mark out where the mats would go. Measuring in equal distances from the edges and using the grid template, it was just a case of marking lightly with a pencil all around each square; there was no need to go right into the corners.
Marking out the squares for the mats.
Taking six mats from each numbered bag as prepared earlier, they were placed randomly around the grid, facing in different directions for added interest. Thirty five mats were required, so the left over one went back in the bag.
All the mats set out on the grid.
Sticky tape was applied to the backs of all the mats and each one stuck down. Once complete, the three extra mats at the outer edges were added too.
All the mats stuck down.
Next, the small images were applied.
Small images added.
Next I removed all the numbers and title letters from the bag and inked all the edges, setting them out on the mats as I went along, to be stuck down later.
Inking the numbers and letters.
Once all the numbers had been stuck down, the title added and the last of the stamping done, the page was finished.
The finished date page.
The Front Cover and Finishing the Calendar
The front cover was put together in much the same way as the other decorative pages. Here is the process in pictures.
The design, front cover and bag of elements to put on it.Laying out all the templates to draw around.Pencil guidelines for the mats.The mats all stuck down.Assembling the images.Inking the letters.The completed front cover.
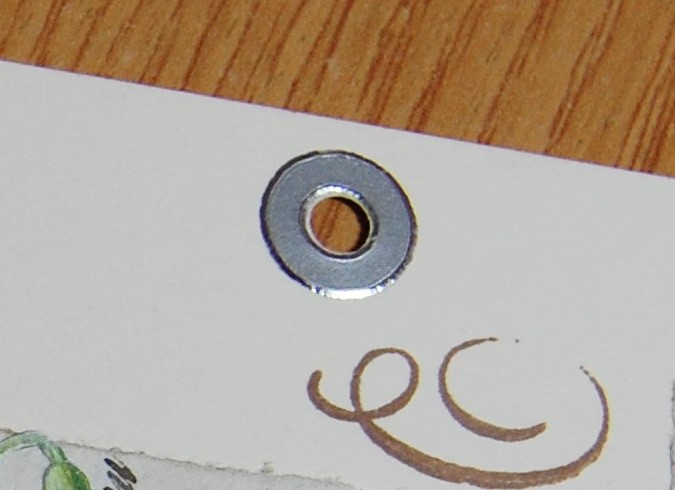
As a finishing touch, silver reinforcement rings in the form of peel-off stickers were added to all the hanging holes, however it wasn’t necessary to add them to all the ring holes at the joining point as this would have required many more rings than I had available.
Reinforcement rings were added to all the pages.
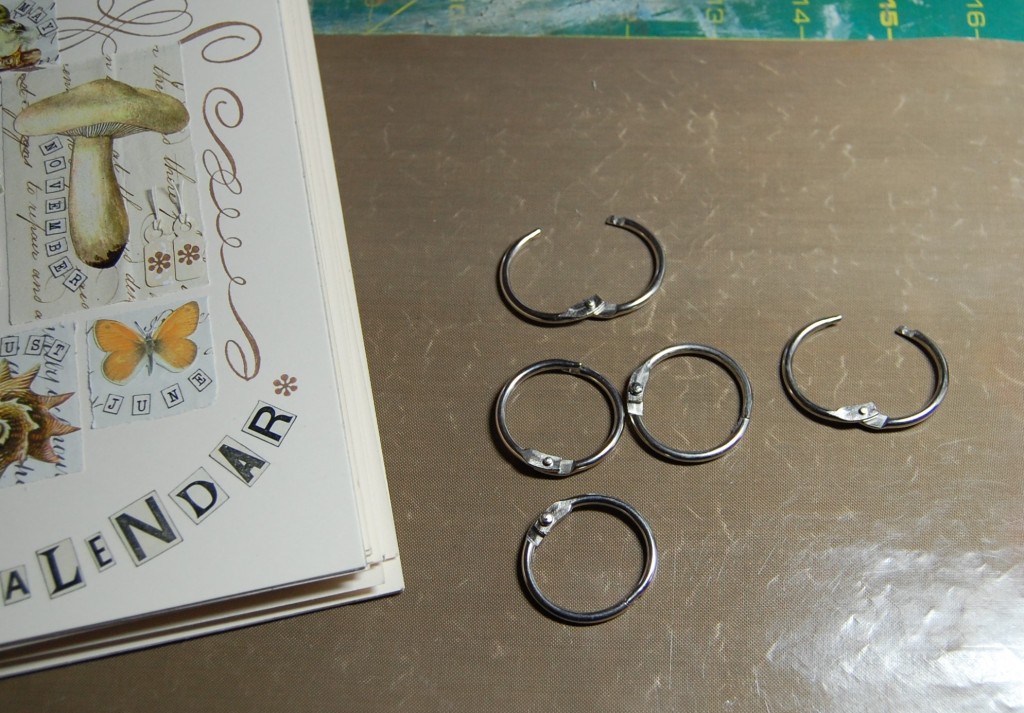
I joined the calendar together using metal book rings. The ones in the photo proved to be a bit too small, so I actually used slightly larger ones.
Book rings for joining the calendar together.
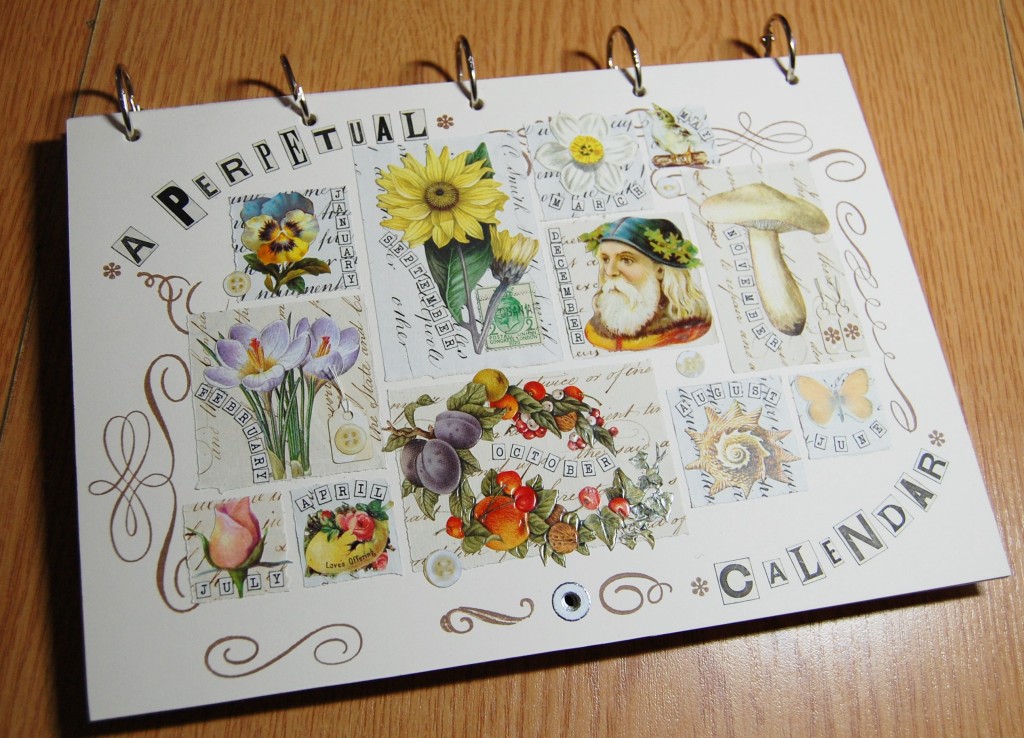
Once the book rings were threaded through all the pages and the covers, the calendar was finished and ready for hanging.
The finished calendar.
See Part One for photos and descriptions of all the pages in the calendar.
Hello! I am Alison, The Magpie Crafter. I just love turning old scruffy bits of paper into works of vintage art. I am a Yorkshire magpie and love to find 'owt for nowt'!